
Since the launch of the No Man’s Sky: Companions update, we finally have the ability to adopt alien critters from the planets we explore. Not every alien can become your new best friend, some are simply too bizarre or require too delicate an environment. This group of untamable beasts, however, represents only a small percentage of No Man’s Sky’s billions of randomly generated species. The rest are up for grabs, be it by intergalactic animal lovers or aspiring mad scientists.
Like everything else in No Man’s Sky, what at first appears to be a simple, fun way to take a piece of the universe home with us is actually a sprawling cavern of hidden mechanics and unexplained interactions. I’m here to help you demystify companions in No Man’s Sky, from your very first alien pet to running your very own intergalactic breeding program.
What do Companions do?
Companions can help you in a number of ways. They can be equipped with various gadgets, from mining lasers to flashlights, and will take up an adventuring role alongside you. How well they use their equipment is up for debate, but even with the game’s mediocre AI, most companions will still somewhat perform their tasks. (Even if they aren’t very efficient, they’re doing their best!)

Larger creatures can also be ridden, allowing players to quickly traverse planets without the need for an exocraft or a spaceship. Even flying creatures can be mounted, allowing for a large area to be surveyed during travel. You can use tools such as your scanner and mining lasers while your mounted companion is moving, allowing you to sit back and enjoy an alien-guided safari.
Some companion will help you in combat, either dispatching threats on their own or helping you to bring them down. Large predators tend to be aggressive, and will help you fend off everything from sentinels to other fauna. Be mindful of your companion’s health in combat, though. Your companion won’t die, but it might get knocked out and need some time to recover.
Many companions will also direct you to areas of interest, such as undocumented wildlife and distress signals. Companions can track fauna to reveal their hiding spots, or mark points of interest on your map. Where and how often companions help you out will depend on the companion itself, but often you’ll find things you may have otherwise missed while traveling with your companion.
The Companion Register
The companion register is the main menu you’ll use when working with companions in No Man’s Sky. It can be accessed through the quick menu, and is the hub for all your companion-related needs.

The companion register is an animal lover’s best friend!
You’ll start with a couple of unlocked slots, and can purchase up to a maximum of 6 using Nanites. The final slot costs a whopping 10,000 Nanites, so they can become quite expensive. The register will tell you about your companions’ current moods, native habitats, how much they trust you and how old they are. If you want to rename or abandon your companions, you can also do so from the companion register.
The companion register also tells you about the personality of your pet, which helps you predict how it will act and what its usefulness to you is while exploring. These personality traits are discussed in-depth later on in the companion traits segment, since they can be a bit hard to understand.
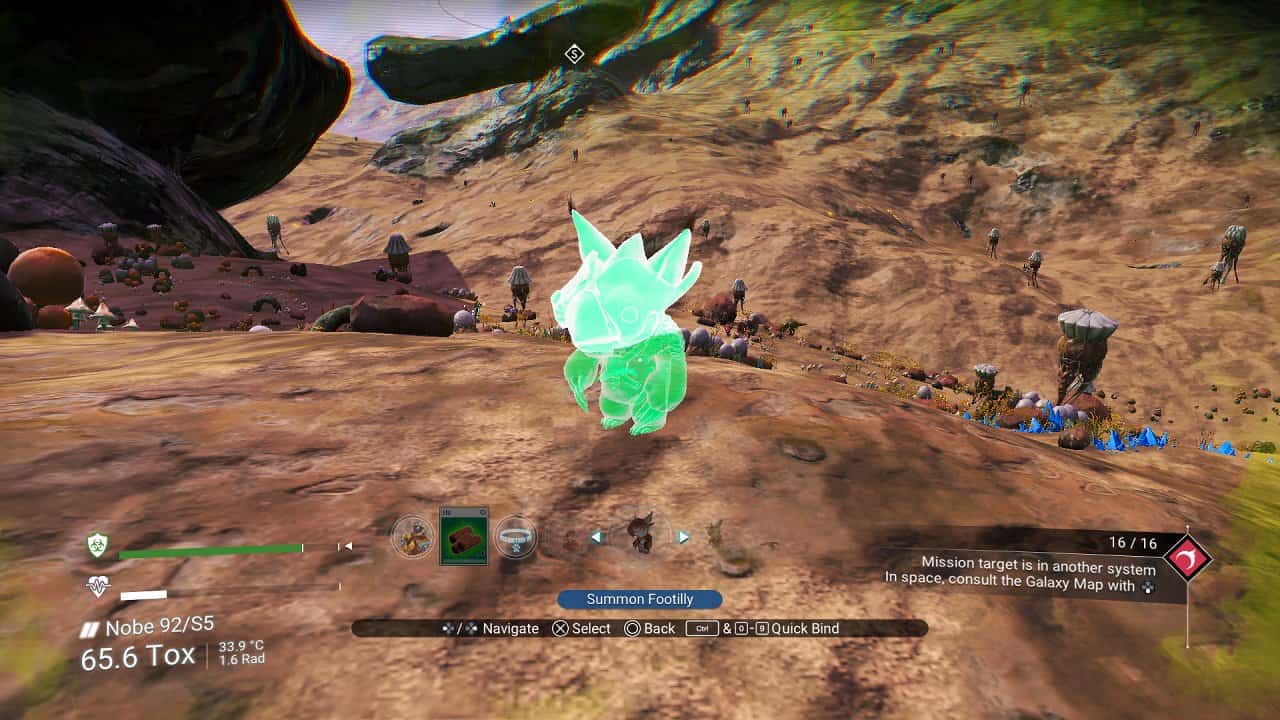
You can summon your friends on-demand!
Any of your registered companions can be summoned from the quick menu, in the same way as starships and exocrafts. Only one companion can be active at a time, so summoning or taming a new critter will dismiss your current companion. They can’t be summoned inside planetary structures, space stations or freighters. They can be summoned on board the space anomaly, but they will appear as intangible holograms instead of their normal selves.
How Can You Get Companions?
When it comes to obtaining companions, you have two main options. The first is to go to a planet and tame a creature yourself by earning its trust. These tamed creatures are exactly like their brethren of the same species, and will share their traits and stats. You can also hatch a companion from an egg, either obtained from another traveler or from one of your own current companions. These creatures will be slightly different from their parents, and can be genetically edited to make some truly terrifying beasts.
Taming
The premier way to get companions in No Man’s Sky is to tame wild fauna on planets. You can take almost any fauna as a companion, with a small handful of exceptions.

The best way to an alien’s heart is through its stomach.
Before you can take your new pet home, you’ll need to earn its trust. Start by crafting some Creature Pellets, which require 60 Carbon each. You can obtain the Carbon by mining up flora on planets. If it’s a robotic companion you’re after, you’ll instead need an Ion Battery. These can be crafted for 5 Ferrite Dust and 10 Cobalt each. These materials can be mined from planetary minerals. Once you’ve got the treats, you need to run up to the creature you want to tame. A prompt to hold the interact button will appear, and you’ll need to press and hold to feed the pellets to the fauna.
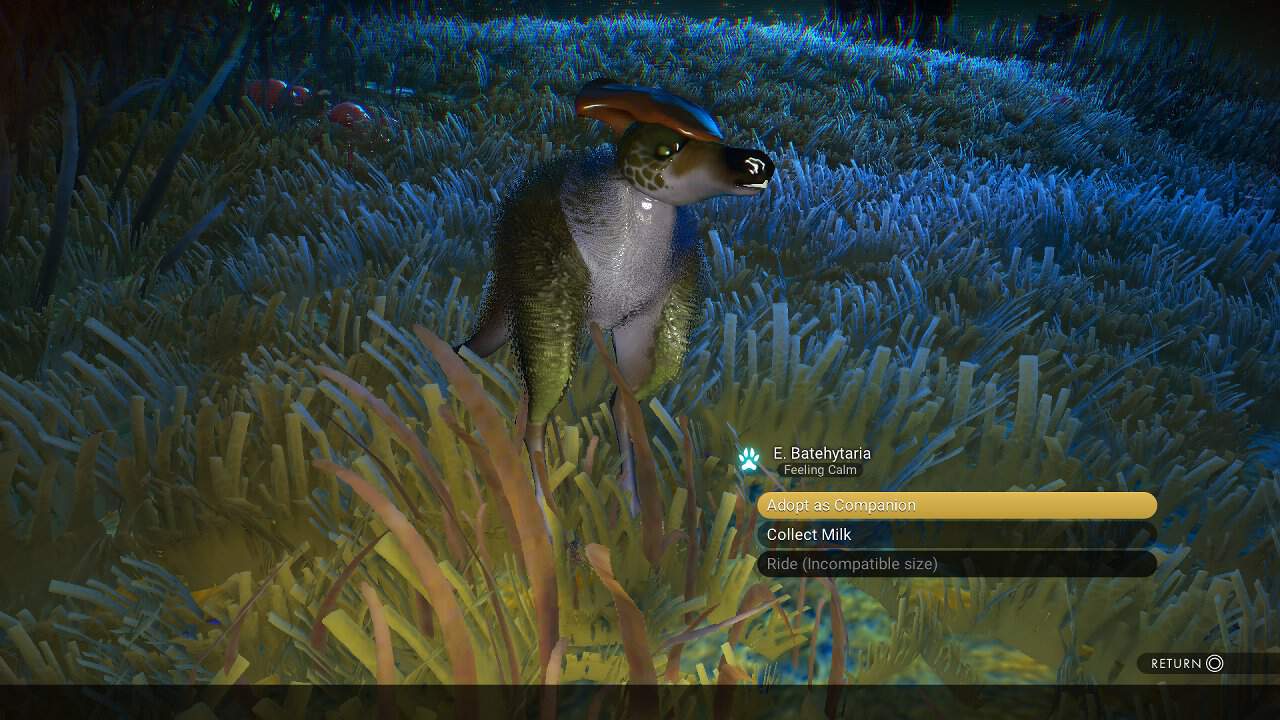
I can take this little guy with me on my journey!
A fed fauna will not run or attack you, and will instead look idly at you. You can hold the action button to interact with it once more. If you have an empty space in your companion register, you can then select to adopt the fauna as a companion.
Breeding
Once every 24 hours, your creatures can produce an egg. In order for a companion to lay an egg, you’ll first need to take your creature to a planet with the climate to which it is native. You will also need to own fewer than 6 eggs, and your companion needs to be fully grown for its species. Assuming these things are true, you’re ready to go! You can learn which climate that is by checking your companion register. You can use your starship scanner to check the climate of nearby planets from space until you find one that is suitable.

If you take good care of your creatures they’ll multiply!
Once you arrive on the planet, you’ll need to make sure your companion is comfortable. Feed it creature pellets and pet it until its needs are met, then interact with it. If everything has gone correctly, you should have the option to induce an egg. If the option is still greyed out, you can check to see which of your companion’s needs aren’t met. With the egg in hand, you now need to incubate it. This will take another 24 real life hours. During this time, you can trade the egg, edit it with the egg sequencer, or simply just hold it until it’s ready to hatch! If you have an empty spot in your companion register, you can hatch the egg from your inventory and summon your new pet.
Exploring With Companions
Companions can help you explore, from digging up gifts to bring you to helping defend you in combat. While you can let your companion run about at its own whim, knowing how to care for and instruct your companions is key if you want to get the most from their aid. Each companion will need care each time you play No Man’s Sky, so be sure to check up on them regularly.
Caring for Companions
The more you care for your creature, the more it will come to trust you. It’s important to gain your companions’ trust, and to do so, you’ll have to care for them. While logged in to No Man’s Sky, your companions’ love and hunger will drain. Summoned companions will have their needs drained even faster, especially if being instructed.

Your companions will tell you what they need. Make sure you listen!
Each time you log on, make sure you summon each companion, feed it and give it some attention. Check in frequently with companions helping in your adventure, and they’ll be more likely to help you out in the future!
Instructing Companions
To instruct a companion, you’ll need to find the point emote located in either the pet or emote sections of the quick menu. Then, simply choose a direction and use the emote. Your companion will immediately start dashing, crawling or flying in the direction you indicated. Eventually, it will stop running, and investigate the area.

Go my minion, and bring me ferrite dust and fossils!
After issuing this command, your companion may execute a special function. The function executed is determined, in part, by your companion’s traits. Your companion may dig up and retrieve resources for you, scan your surroundings, leave a glob of dung for you to harvest or mark a point of interest on your map. Unfortunately you can’t directly control your pet’s actions, so you’ll have to learn on your own which critters are best suited for which tasks.
Companion Traits
A companion has three attributes which dictate its behavior. These traits are coupled, meaning that a companion may have only one of the two possible traits. For example, a companion can be either helpful or playful, but never both. Each trait is measured by a percentage, ranging from 0% to 100%, which shows how well it is embodied by your companion. Knowing your companion’s traits is essential to understanding how it behaves and whether or not it will help you on your journey.
Industriousness – Playful and Helpful
Industriousness is a measure of how hard your companion will work for you. Helpful creatures will execute more and better commands, and may even put themselves to work without your input. Playful companions, on the other hand, will simply run back to you demanding attention. Some playful companions will even leave smelly dung presents for you to clean up! The higher a companion’s helpfulness, the rarer materials they will retrieve. Some treasures can be worth over 1,000,000 Units, which is well worth the cost of pet food. Helpful companions tend to recover better treasures, so consider bringing one with you for some extra cash.
This companion brought me a fossil worth 1,500,000 Units!
A 100% helpful companion will never leave you dung balls, while a 100% playful companion will never collect resources. Helpful companions are more desirable, as they will bring back valuable resources more reliably. If retrieving small amounts of basic resources sounds appealing, you can also opt for a companion with moderate helpfulness. These companions will tend to bring back sums of Carbon, Sodium and other basic elements instead of the frequent scrap and fossils found by more helpful critters.
Aggressiveness – Gentle and Aggressive
Aggressiveness is a way to describe how willing your companion is to fight. Aggressive creatures are more likely to defend you against other fauna, hazardous flora and even sentinels. Aggressive companions may also hunt other fauna, which allows them to refill their own hunger meter. Gentle companions, however, tend to stay away from combat when they can. A gentle companion also has a higher chance to scan its surroundings for resources or locations of interest when issued a command.

Aggressive companions will stay by your side through thick and thin.
A 100% aggressive creature will never scan its surroundings, while a 100% gentle companion will never hunt. Aggressive companions are typically more desirable, since they will help you in combat more often. If you’d prefer your companion to scan the area frequently, then you may opt for a more gentle companion.
Independence – Devoted and Independent
Independence is the willingness of your pet to move and act on its own. Devoted pets will stay close to you and wait for a command to act. They execute orders in a very small radius, and will not wander from your side. Meanwhile, an independent companion will explore and interact with the world on its own accord.

Devoted companions stay close, which makes them a good way to show your alien breeding skills off!
Independent creatures are more self sufficient, which causes their love meter to deplete slower than that of their devoted counterparts. For these reasons, independent companions are more desirable than devoted ones. Devoted companions will stay close to you and won’t wander, so if you’d like to show your companion off in the Space Anomaly, a devoted companion may provide a better aesthetic effect.
Companion Equipment
When interacting with your companions on a planet, you’ll notice one of your options is to customize it. This allows you to mount various field equipment on your companion. The menu includes everything from scanners to armor to storage containers, and which devices a companion can equip is determined by its body type and size. Most of these devices are purely cosmetic, but a select handful actually have effects of their own.
Square and Round Lasers
Square and round lasers can be equipped to companions in order to upgrade their hit boxes. In order to mine or attack an object or fauna, your companion needs to be close enough to actually make contact with it. The lasers help remedy that, allowing your companion to mine from a slight distance.
Giving an alien a laser may not be the wisest thing to do…
There is no functional difference between the square and round lasers, they simply have different cosmetic models. The square laser is unlocked for use by default, and the round laser can be purchased from the Quicksilver vendor on board the Space Anomaly.
Torch
This equitable companion torch functions much the same as your existing torch, allowing your companion to illuminate the area directly in front of it. Your companion’s torch toggles on and off in sync with your exosuit torch, allowing you to control it directly. Unfortunately you can’t control your companion’s movements, which limits the functionality of this tool. It can still be useful when riding some creatures, but is otherwise somewhat lackluster. The torch is unlocked for use by default.
Vitals Monitor
The vitals monitor can be attached to most companions, and glows to indicate your companion’s current wellbeing. This helps you know when it’s time to feed and pet your companions, which in turn helps you build trust with them. The vitals monitor is unlocked for use by default, and can be equipped to most companions.

That blue glow means my alien friend is ready to get to work!
A happy companion’s monitor will glow bright green, indicating that all its needs have been met. A contented companion’s monitor will glow blue, which shows that it isn’t in need of care just yet. If a companion’s mood begins to drop, the monitor will glow red. Once this happens, make sure to check in with your companion and see what it needs to thrive!
Egg Sequencing
Evolution takes a long time, and it is hard to be patient. Each companion hatched from an egg looks and behaves slightly different from its parents, but what if these slight differences aren’t quite interesting enough?

The egg sequencer is located in the right wing of the Space Anomaly.
To solve that issue, we have the egg sequencer. This nifty little device can be found in the far right corner of the Space Anomaly, and allows you to change the genetics of the egg directly. The egg sequencer accepts four different catalysts, each of which has a different effect on the creature’s appearance and personality. Eggs can be sequenced multiple times prior to hatching, which allows the values of the resulting creature to be customized in a very detailed fashion. At the bottom of this section is a table, which shows which items can be used to achieve which effects.
Growth Hormone
The growth hormone slot is where you place catalysts that affect your companion’s size. Items placed in this slot will increase or decrease the size of your companion once it hatches. More valuable resources will require the use of fewer units to achieve results.

Messing around with growth hormones can create adorable results!
The growth hormone can be applied to a maximum dose of 100%, but smaller doses will have more subtle effects. A 100% dose will grow or shrink the companion by about half a meter, and the egg can be sequenced repeatedly to reach the desired size.
Gene Splitter
The gene splitter slot is where you place catalysts to create drastic mutations. A 100% catalyst dose will cause your new companion to look different from its parent, but why stop there? The gene splitter can be overdosed to a maximum of 150%, and doses that high will create some seriously unstable results.

Companions hatched from eggs overdosed with a gene splitter look wildly different from their parents.
An overdosed egg will hatch into a creature that looks extremely different from its parent, although it will keep a similar overall body shape consistent with its taxonomy. Most items will have the same effect when placed in this slot, but rarer materials require fewer units to achieve the same effects.
Dye Injector
The dye injector slot is for items that will affect the coloration of your new companion. Each item has a hidden value that codes for a specific color or color combination, and they can be added to this slot to reach a maximum dose of 100%. The table at the bottom of this section details which items give which colors, since this tends to not be obvious at first glance.
Neural Calibrator
The neural calibrator slot accepts catalysts that affect a companion’s personality traits. Each catalyst raises a specific trait. If a companion doesn’t have the trait affected by the catalyst, it will instead reduce the companion’s current trait.

Evolution takes a while, but we can speed the process up a bit.
For example, if you use a catalyst that increases gentleness on an aggressive creature, it will reduce its aggressiveness until it becomes 0. Any remaining gentleness bonuses are then applied to gentleness like normal, and the companion’s trait will change from aggressive to gentle.
Catalyst Effect Tables
The following tables show the effects that various resources have when placed into the different slots of an egg sequencer. This is by no means an exhaustive list, but rather a starting point for various desirable traits that can be induced with items most players already have in abundance. These tables are best searched for specific traits, elements or colors.
Element Catalysts
| Resource | Growth Hormone Effect | Dye Injector Coloration | Neural Calibrator Effect |
| Carbon | Increased Size |
Red Red and Blue |
+ Helpfulness – Playfulness |
| Condensed Carbon | Decreased Size |
Gray and Red Green and Red |
+ Helpfulness – Playfulness |
| Oxygen | Increased Size |
Dull Yellow Dull Yellow, Orange and White |
+ Helpfulness – Playfulness |
| Di-Hydrogen | Decreased Size |
Gray Red and Gray |
+ Independence – Devotion |
| Deuterium | Decreased Size |
Gray Red and Gray |
+ Helpfulness – Playfulness |
| Tritium | Decreased Size |
Green and Mint Green Green, Mint and/or Orange |
+ Helpfulness – Playfulness |
| Ferrite Dust | Decreased Size |
Gray and Green Gray, Dark Green and/or Orange |
+ Helpfulness – Playfulness |
| Pure Ferrite | Decreased Size |
Orange and Purple |
+ Helpfulness – Playfulness |
| Magnetized Ferrite | Increased Size |
Bright Yellow Bright Yellow and Dull Red Bright Yellow and Gray |
+ Helpfulness – Playfulness |
| Silicate Powder | Increased Size |
Lime Green, Silver and/or Gray |
+ Helpfulness – Playfulness |
| Sodium | Increased Size |
Brown and Orange |
+ Devotion – Independence |
| Sodium Nitrate | Increased Size |
Brown and Orange |
+ Devotion – Independence |
| Salt | Increased Size |
Mint Green, Pale Yellow and Brown |
+ Aggressiveness – Gentleness |
| Cobalt | Decreased Size |
Green, Tan and Orange |
+ Helpfulness – Playfulness |
| Ionized Cobalt | Increased Size |
Green and Sky Blue |
+ Devotion – Independence |
| Chlorine | Increased Size |
Yellow-Green and Blue-Gray |
+ Devotion – Independence |
| Cyto-Phosphate | Increased Size |
Yellow-Green, Green and Brown |
+ Devotion – Independence |
| Copper | Decreased Size |
White, Green and Orange White and Green |
+ Helpfulness – Playfulness |
| Activated Copper | Increased Size |
Yellow, blue-Gray and Green |
+ Devotion – Independence |
| Cadmium | Increased Size |
Orange and Blue |
+ Independence – Devotion |
| Activated Cadmium | Increased Size |
Gray and Mint Green Gray, Mint Green and Green |
+ Independence – Devotion |
| Emeril | Increased Size |
Blue and Pale Yellow |
+ Independence – Devotion |
| Activated Emeril | Increased Size |
Gray, Silver and Mint Green |
+ Gentleness – Aggressiveness |
| Indium | Increased Size |
Pale Yellow and Mint Green |
+ Aggressiveness – Gentleness |
| Activated Indium | Increased Size |
Green and Brown Green, Brown and Cream |
+ Gentleness – Aggressiveness |
| Chromatic Metal | Decreased Size |
Pale Yellow and Red |
+ Helpfulness – Playfulness |
| Paraffinium | Decreased Size |
Gray and Mint Green Gray, Mint Green and Brown |
+ Helpfulness – Playfulness |
| Pyrite | Decreased Size |
Mint Green and Gray Mint Green, Gray and Brown |
+ Helpfulness – Playfulness |
| Ammonia | Increased Size |
Lime Green and Tan Lime Green, Tan and Gray |
+ Devotion – Independence |
| Uranium | Decreased Size |
Purple and Green Purple, Green and Gray |
+ Gentleness – Aggression |
| Dioxite | Decreased Size |
Silver, Gray and Mint Green |
+ Helpfulness – Playfulness |
| Phosphorous | Increased Size |
Brown, Mint Green and Pink Brown, Mint Green and Crimson |
+ Aggressiveness – Gentleness |
| Basalt | Decreased Size |
Green and Gray Green, Gray and Pale Yellow |
+ Helpfulness – Playfulness |
| Mordite | Increased Size |
Purple, Red and Tan |
+ Aggressiveness – Gentleness |
| Pugneum | Decreased Size |
Gray, Green and Crimson Gray, Green and Pink |
+ Aggressiveness – Gentleness |
| Silver | Increased Size |
Maroon, Gray-Blue and Green |
+ Devotion – Independence |
| Gold | Increased Size |
Maroon, Gray-Blue and Green |
+ Devotion – Independence |
| Platinum | Increased Size |
Maroon, Gray-Blue and Green |
+ Devotion – Independence |
| Sulpherine | Increased Size |
Pale Yellow, Pale Purple and Brown |
+ Independence – Devotion |
| Radon | Increased Size |
Blue-Gray and Maroon Blue-Gray and Pink |
+ Devotion – Independence |
| Nitrogen | Increased Size |
Blue-Gray, Green and Maroon |
+ Devotion – Independence |
| Faecium | Decreased Size |
Brown and Yellow-Green |
+ Helpfulness – Independence |
| Solanium | Increased Size |
White, Green and Blue |
+ Independence – Devotion |
Raw Material Catalysts
| Resource | Growth Hormone Effect | Dye Injector Coloration | Neural Calibrator Effect |
| NipNip Buds | Decreased Size | Green, Pale Yellow and Blue |
+ Gentleness – Aggressiveness |
| Kelp Sac | Decreased Size |
Mint Green, Brown and Red Mint Green, Brown and Pink |
+ Gentleness – Aggressiveness |
| Marrow Bulb | Decreased Size |
Light Blue, Silver and Blue Light Blue, Silver and Turquoise |
+ Gentleness – Aggressiveness |
| Star Bulb | Decreased Size |
Brown and Gray Brown, Gray and yellow |
+ Playfulness – Helpfulness |
| Cactus Flesh | Decreased Size |
Gray, Mint Green and Pale Yellow Gray, Green and Mint Green |
+ Playfulness – Helpfulness |
| Gamma Root | Increased Size |
Light Blue and/or Silver |
+ Gentleness – Aggressiveness |
| Fungal Mold | Decreased Size |
Mint Green and Orange Mint, Orange and Green |
+ Playfulness – Helpfulness |
| Frost Crystal | Decreased Size |
Maroon and Crimson |
+ Playfulness – Helpfulness |
Crafted Good Catalysts
| Resource | Growth Hormone Effect | Dye Injector Coloration | Neural Calibrator Effect |
| Carbon Nanotubes | Decreased Size | Gray and Blue-Gray |
+ Helpfulness – Playfulness |
| Di-Hydrogen Jelly | Increased Size | Lime Green, Green and White |
+ Independence – Devotion |
| Life Support Gel | Decreased Size | White, Sky Blue and Gray |
+ Aggressiveness – Gentleness |
| Starship Launcher Fuel | Increased Size | Gray, Purple and Sky Blue |
+ Independence – Devotion |
| Unstable Plasma | Decreased Size | Turquoise, Blue and Gray |
+ Devotion – Independence |
| Antimatter | Increased Size | White, Gray and Crimson |
+ Independence – Devotion |
Curiosity Catalysts
| Resource | Growth Hormone Effect | Dye Injector Coloration | Neural Calibrator Effect |
| Sac Venom | Increased Size | Brown, Mint Green and Sky Blue |
+ Aggressiveness – Gentleness |
| Gravitino Ball | Increased Size | Yellow and Crimson |
+ Independence – Devotion |
| Albumen Pearl | Decreased Size | Blue Gray and Gray | No Effect |
| Larval Core | Decreased Size | Lime Green, Blue and Purple |
+ Aggressiveness – Gentleness |
| Living Pearl | Decreased Size | White, Cream and Purple | No Effect |
| Hypnotic Eye | Increased Size | Lime Green, Green and Purple |
+ Independence – Devotion |
| Hadal Core | Decreased Size | Green, Mint Green and Purple |
+ Aggressiveness – Gentleness |
| Crystal Sulphide | Increased Size | Purple, Cream and White |
+ Independence – Devotion |
| Storm Crystal | Increased Size | Green and Yellow |
+ Gentleness – Aggressiveness |

Daniel
Thank you – I learned many things I did not know about the companions and appreciate the knowledge!
TerranRich
Finally! This chart is exactly what I have been looking for. Thank you so much for your research!