

Diving into the God of War side quests not only gives you more gameplay after the big climax, but also rewards you with great gear and new upgrades. Most of the areas and storylines needed to get through our list will be available after completing the main story. However, you can also do some of them while still traversing through the land as Kratos. Work as you go, or dive back into the journey after the credits roll. Without further ado, here are all of the God of War (2018) Favors and the rewards you’ll get for completing them!
Spoiler warning from here on out.
Dwarven Quests
Second Hand Soul

Finish Second Hand Soul and receive the Grips of Volunder.
Second Hand Soul is a favor from the dwarven blacksmith Brok, who asks you to go into the mines to check up on his friend Andvari. To get to him, sail through the Volunder Chasm and dock your boat before exploring the area. Once you make your way under a crawl space, you’ll see Brok working at his bench, and after a conversation, he’ll give you the Volunder Entry Stone.
Follow the paths and hidden entryways down into the mines until you reach a door sealed off by 3 glowing blue runes. Break the runes and head through the door to face off against the dreaded Soul Eater. Once he is defeated, go around and collect what he dropped, which include the Fire Sigil of Protection and The Alchemist’s Ring. Return to Brok with the ring and you will receive the Grip of Volunder.
Fafnir’s Hoard

Completing Fafnir’s Hoard will grant you the Talisman of Betrayal
One of the earlier side quests of the game has the other dwarven brother, Sindri, sending you into a dragon’s lair. You will get the quest Fafnir’s Storeroom around the time you travel to Alfheim for the first time. Sindri desires a rare whetstone of great value that sends you to the hoard of Fafnir, a dwarf turned dragon (You won’t actually see the creature during this mission, but stick around for the Dragon section of quests later on).
To find the storeroom, you need to head Northwest across the Lake of Nine to an area called Fafnir’s Ravine, located right under the World Serpent’s head. Once you arrive at the location, the entryway will be sealed. After finding the secret passage behind the waterfall, follow along until you reach the central area of the storeroom. Here, you will see 5 chambers you can enter to clear out.
The first chamber has 2 Draugr to fight. The second contains two Reavers and a Viken. The third room houses two Reavers. Chamber four is filled with wolves, but has loot to collect in the aftermath. The final chamber is empty save for a legendary chest containing Wrath of the Frost Ancient. Here, you can talk to a reaver spirit before fighting off against two Ogres. After the battle, return to Sindri to receive a Talisman of Betrayal.
Deus Ex Malachite

After finding Andvari’s Hammer, Brok will reward you with an epic enchantment.
After finishing the Second Hand Soul side quest and progressing through the game, Brok will stop you once again to ask for a favor. This quest will send you into the Landsuther Mines to search for Andvari’s Hammer. Docking on the beach at the Landsuther Canyon, Brok will give you the Landsuther Entry Stone and you’re ready to start exploring.
Finding Andvari’s hammer will throw you into hordes of enemies that stand in your way. After battling through Travelers, Nightmares, Tatelworms, and Elves, you’ll have to face off against the Dark Elf Lord. Defeating him will earn you the talisman, Aegir’s Protection. After all is said and done, locate the gate leading to a store room, and boost Atreus over it. In a golden chest towards the back is Andvari’s Hammer. Return to Brok to gain the epic enchantment, Andvari’s Soul.
Family Business

After getting the whetstone, Sindri will reward you with the Hraezla Farmadr’s Grip axe pommel.
After completing the Fafnir’s Hoard quest, Sindri will ask you for another favor to complete. He’ll give you the Northri Entry Stone to retrieve a rare whetstone at the Northri Stronghold. Continue on the path forward, defeating enemies as you go, until you reach a ship. Getting onto the Raider Ship will cause a cutscene, where Kratos and Atreus will grab the whetstone. After said scene, a Traveler will appear to battle. Defeating it will give you the Shattered Gauntlet of Ages talisman. Returning to Sindri will give you the legendary Axe Pommel, Hraezla Farmadr’s Grip.
Hail To The King
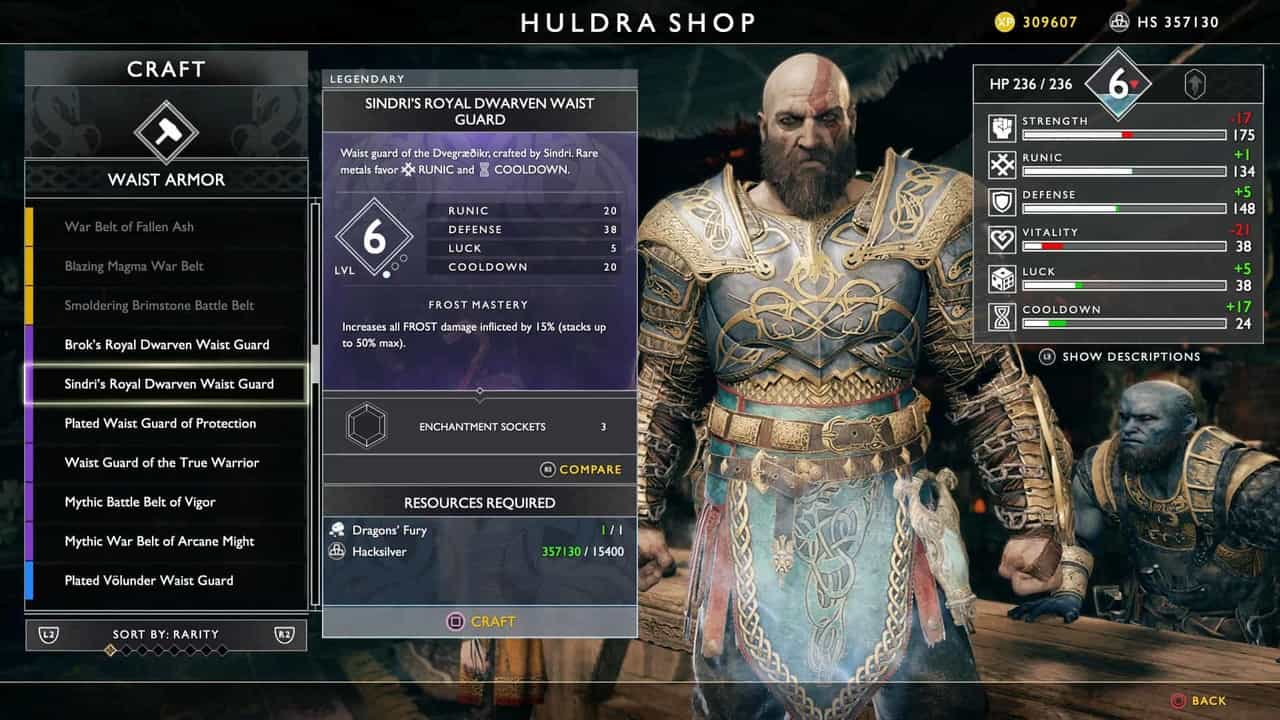
Brok and Sindri each have their own armor sets, each with unique stats and abilities.
Hail To The King is your fifth Dwarven Favor, and the first to be given after Brok and Sindri reunite. Visit Brok’s shop at Tyr’s temple after the above 4 quests have been completed to get the entry stone to Konunsgard. You will make your way to the Konunsgard Stronghold but you won’t be able to enter. Collect the entry stone from the Knight corpse to have 1 of 3 keys. Follow the path on the left to come cross Werewolves and a Stone Ancient before completing a few blue crystal puzzles. Back where the Stone Ancient was, use your Blades of Chaos to transfer the green orb and open a door leading to entry stone #2.
Head back to the main gate and take the path on the right for the next stone. After defeating an Ogre spawn, you can climb across some pillars to see a giant dragon in the distance. Follow along until you come to a door with 3 seals keeping it shut. Complete the puzzle to unlock the door and head down. The third key is at the end of the path, but you can free the dragon by destroying the shrines if you wish. (Freeing this dragon is necessary for a different quest, The Fire of Reginn). Head back to the Stronghold and defeat the Traveler to trigger a cutscene. Meeting Brok and Sindri back at Tyr’s Temple will give you the ability to craft 2 sets of master armor, one for Brok and one for Sindri.
Ivaldi’s Workshop
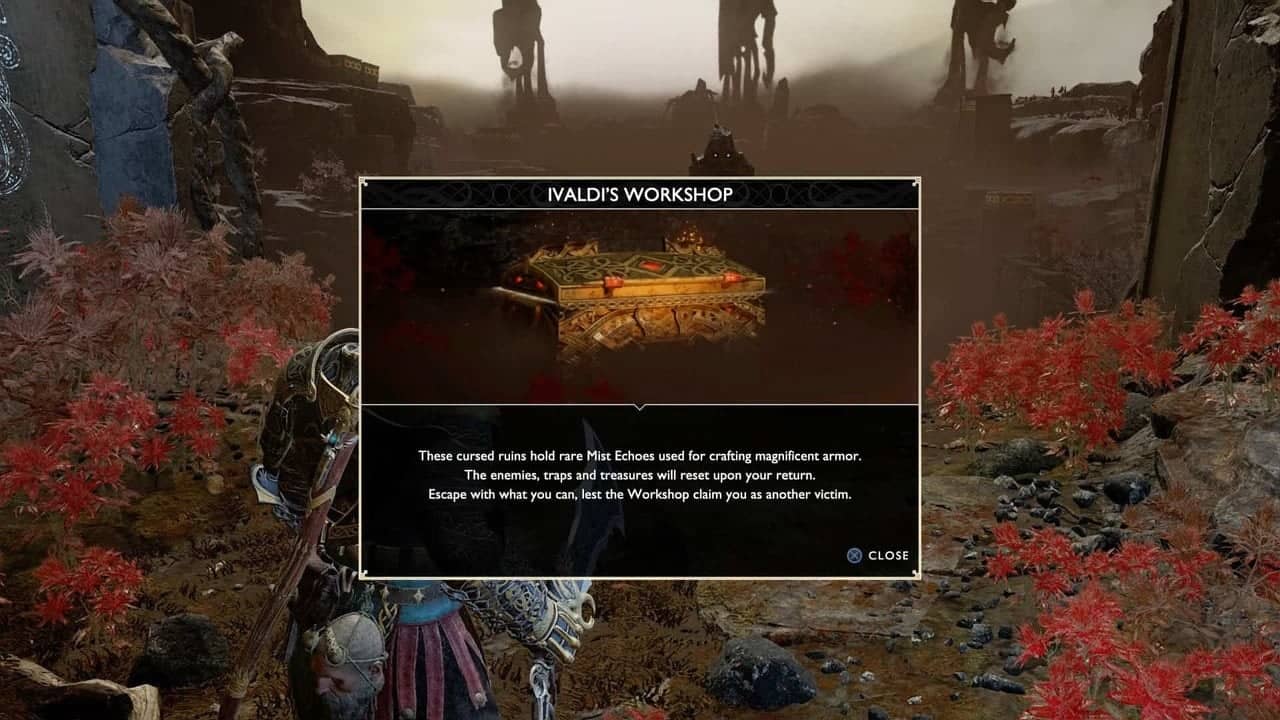
Similar to the Muspelheim Trials, Niflheim is a puzzle-reward system.
Ivaldi’s Workshop is the first quest inside the realm of Niflheim, requiring a completed language cipher. Entering Niflheim, Sindri’s shop is straight ahead, where he’ll give you different missions. First up is to collect 500 Mist Echoes. The entire realm is basically a randomized maze of traps, enemies, and deadly mist. You can find Mist Echoes by searching the chests that re-spawn when you leave the area. After collecting 500 Mist Echoes, return to Sindir’s shop and purchase the Niflheim Entry Stone. At the start of the mist is a pedestal to place the stone and open a center chamber, which starts the next quest.
Ivaldi’s Protection

Continuing through Niflheim will get you stocked up on Mist Echoes and Legendary Armor.
Niflheim’s second quest starts right where we left off during the last mission. In the center room we entered, the first red chest you enter will contain Ivaldi’s Rusted Armor. Taking it back to Sindri will allow you to create the legendary Ivaldi Armor sets. Right after this is done, you’ll start the Ivaldi’s Curse quest.
Ivaldi’s Curse
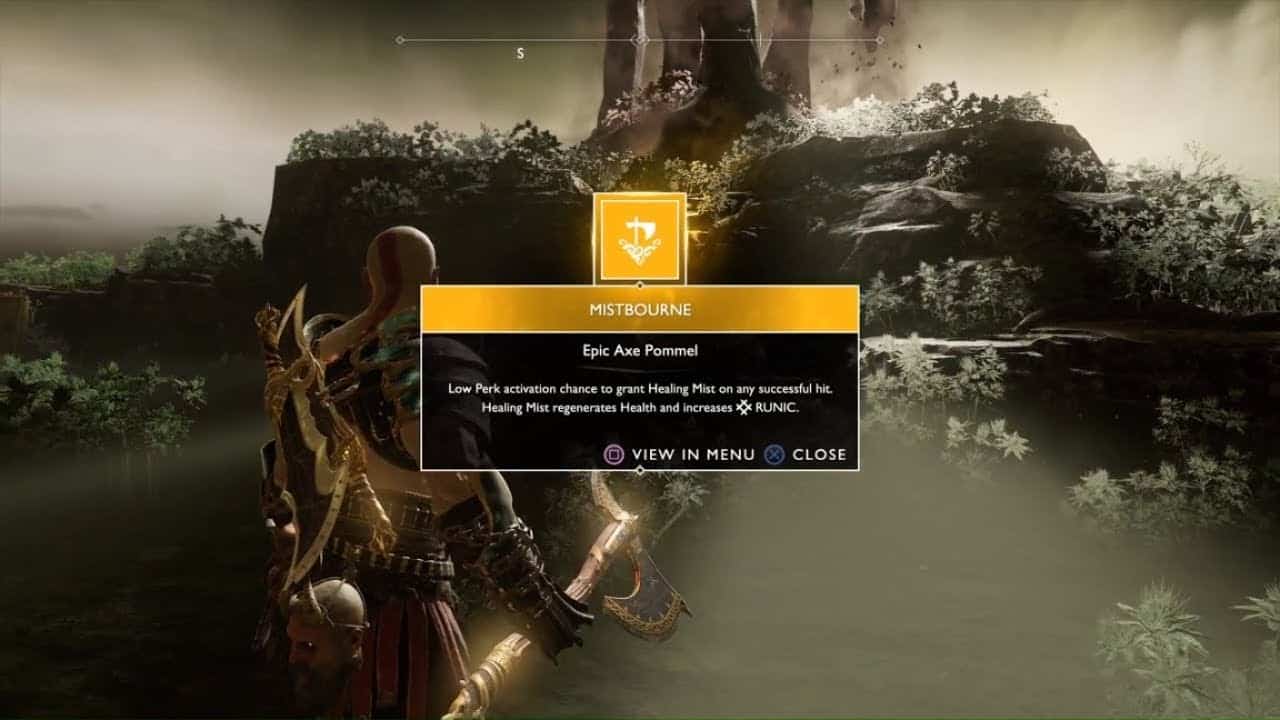
Ivaldi’s final quest will reward you with several important items.
The large center workshop from the last quest contains three Realm Tears. Unlike the others throughout the game, these Tears require you to pay Mist Echoes to interact with them. The three costs total up to 45,000 Mist Echoes. The first Tear will be a few Ogres and will give you the Gift of Apollo Runic Attack. The second Tear is Soul Devourer that will gift you the Mistbourne Epic Axe Pommel. The final Tear is just a few Revenants that will drop the Talisman of Cursed Power.
Wayward Spirits Quests
Unfinished Business

Successfully helping all 4 spirits will give you the Versatile Warrior’s Handle and Corrupted Remnants.
Unfinished Business requires you to find 4 spirits in need of help around the Lake of Nine. The quest will start after you find any of the 4 spirits, but only after you’ve completed the story in Alfheim. Along your journey, you will see several braziers that need to be lit. Doing so will send enemies your way, but defeating them allows you to speak with the spirits. Helping the first spirit with grant you with the Versatile Warrior’s Handle axe pommel, and the other 3 will gift you Corrupted Remnants, used for axe pommel upgrades. The 4 spirit locations are Iron Cove, Isle of Death, the Forgotten Caverns, and the Cliffs of the Raven.
Hammer Fall

Help a spirit get revenge on Thor by destroying his standing effigy in the middle of the lake.
An earlier quest in the story, Hammer Fall allows you to complete a Spirit’s request of revenge against Thor. While you may not be able to face off against the God of thunder and lightning in the flesh, destroying his statue will have to be enough. This quest does feature more puzzle elements than some of the others, so follow closely.
After you beach your boat at Stone Falls, break through the wooden planks on your left, to see a Mystic Gateway. Head through forward and defeat the enemies that spawn before turning to your right and breaking the chains that are holding the bridge up. Cross over the bridge and turn the wheel to raise the gate of Veithurgard. Finally, return to the spirit that you bypassed earlier, to talk to him about the statue of Thor.
Head back to your boat and row through the big gates we just opened, to find yourself in the Veithurgard Pass. Be on the lookout for a fallen pillar. Crawling under it and freeing the boat will land you in the Veithurgard lake, home to Thor’s stature. Now all that’s left is to destroy it. On the winding path leading up to the statue, you can see several glowing symbols protruding from it. Throw Kratos’ axe at each of these until the monument falls to the ground. Before you head back, check the area where the statue once stood to see the spirit’s father, and dig up a legendary axe pommel. Returning to the spirit, he will reward you with an Offering to Tyr.
The Anatomy of Hope

Some of the spirits aren’t what they seam, but it is still worth the trouble to complete their missions.
After finishing up the main story line A New Destination, you can explore more areas of the map. One of those areas is The Mason’s Channel. Once stopped at the boat dock, straight west is another Wayward Spirit that needs your help. The spirit asks you for help finding his love’s bones that have been scattered around the map. There are only three bones locations, making it an easier quest to get completed.
Bone location one is on the other side of The Mason’s Channel, right off of the boat dock. Once on land, use Atreus’ lightning arrows to clear the path forward. The second pile of bones can be found in the Ruins of the Ancient docking area. You can ignore the Ancient without it attacking or start a battle, your choice. Once done, the bones can be found on the North side of the island. For the final pile, sail to the Forgotten Caverns. Once there, enter the cave straight ahead and take the path to a dead end to collect it. Returning to the spirit will cause it to turn into a Revenant to defeat. Doing so will give you another Offering to Tyr.
Dead Freight

This Wayward Spirit quest sends Kratos into hoards of Hel-Walkers to do what he truly does best.
On the Forgotten Cavern’s beach front, another spirit will emerge to speak to you. He asks if you will go and kill his old Hel-Walker turned crew. To do so, head to the Isle of Death. Getting off the boat and heading straight will put you in the middle of Hel-Reavers. Once they’re gone, continue on until you reach the top platform. Slide down the chain to reach the Iron Cove area. Take out the groups of enemies before jumping onto the boat docked in your area. Sail northeast towards the big tower, and stop at the Niflheim Tower dock. At the top of the tower, you’ll be ambushed by 3 more Hel-Walkers. Finish the battle to complete the quest, and you’ll get an Offering to Tyr for your troubles.
Time Heals All

Completing Time Heals All with give you an extremely powerful enchantment, Tyr’s Shard.
For the final Wayward Spirit quest, you’ll be revisiting the site for one of our Dwarven favors. Near the end of the Family Business quest, you will defeat a traveler and find a scroll that takes you back to Fafnir’s Storeroom. Travel back to the Storeroom and enter the final cave off of the central hub. Once you come near, the spirit will awaken and start berating you for coming to bother him. However, once Atreus relays the information from the scroll, the spirit will be at peace. Before he goes, he will reward you with Tyr’s Shard, a powerful enchantment that boosts all of Kratos’ stats.
Dragon Quests
The Flight of Fafnir

Dragon quest #1, The Flight of Fafnir.
The first of three imprisoned dragon quests will send you into some pretty familiar territory. More specifically, the dwarf turned dragon Fafnir himself. To start, head to the beach just north of the Alfheim Tower and dock your boat. Clear your path using Atreus’ lightning arrows and continue on until you get to the dragon in question. To free him, you’ll need to destroy three shrines that are holding him captive.
Shrine #1 is on the far side of the area you enter at, right beside Fafnir’s right claw. Next, on the backside of the arena is a small river you can jump across and scale. In an alcove here, is a Traveler and a few enemy spawns. Take them out and destroy the shrine in the corner. Lastly, down and to the left of where you started is a small path to a clearing with a shrine by the far wall. Once done with that, return to the stone the dragon is attached to, and have Atreus destroy the skull anchor. Be careful while going through this quest, enemies will spawn throughout you being there, and Fafnir himself has a lightning breath attack. In the end, you will receive the enchantment, Brilliant Scale of the Chained, as well as a Dragon Tear.
Otr’s Imprisonment

Dragon quest #2, Otr’s Imprisonment.
The second dragon quest of the game requires visitation to Veithurgard, the location for side quest Hammer Fall. To get access to this dragon, you need to at least open the passage to Veithurgard and defeat the enemies there. The beach where Otr is chained up is just south of where the statue of Thor sits, or sat depending on the circumstance.
Facing Otr, the first shrine is to your right up a small climbable ledge. Next, return to where you started and take the opposite path. Continue north fighting enemies and dodging lightning strikes until you come across the shrine. Finally, if you head east, you can see a broken down bridge, home to the last shrine. This one requires more puzzle solving than any shrines thus far. After getting through the big locked gate, you can turn immediately right to fight a few Reavers and destroy the last shrine. You can now free Otr, but there is plenty to explore and collect in the last shrine’s area. Completing this quest will give you the Brilliant Mark of the Dragon enchantment, as well as an Unstoppable Aura and a Dragon Tear.
The Fire of Reginn

Dragon quest #3, The Fire of Reginn.
For the final dragon quest, you’ll need to travel to the Konunsgard region of Midgard. To unlock this area, you must complete the fifth Dwarven favor Hail To The King. To kick off the quest, enter into Konunsgard and fight through hoards of Draugr until you find a set of giant wooden doors. Turn to the right of the doors to see the last dragon in the distance. Once you’re at the stone that anchors Reginn, head left and jump over a gap to find the first shrine. Right after breaking the first one, you’ll be thrown into a battle against several Draugr and Tatzelwurms. Once you’re done, take the path on the right and follow along to the second shrine. Back in the main area and to the right, is a door locked by three hanging seals. Finish the puzzle to open the door, defeat the enemies, and break the last shrine. Returning to finish the job will land you a rare Dragon Tear.
Muspelheim and Niflheim Quests
The Realm of Fire
Find all of the language ciphers to enter a new to explore realm, Muspelheim.
The Realm of Fire favor is one that allows you to unlock an entire new realm to explore once completed. To unlock Muspelheim, you’ll need to find 4 pieces of a language cipher. These pieces can be found in different chests across the map. The chests can be found at different checkpoints, the first is after you battle the Tatzelwurms for the first time during your journey up the mountain. Then, in Alfheim after the first Dark Elves fight. Third, is off the top of the Summit right when you get the New Destination quest. The fourth and final cipher is in the Witch’s cave entrance off the Lake of Nine. After finishing the cipher completely, return to Tyr’s Temple and use the Bifrost to travel to Muspelheim. Here, you can do several levels of trails to test your combat skills, as well as earn materials for new armor and try your hand at a Valkyrie battle.
The Realm of Fog
Similar to Muspelheim, Niflheim is an extra realm to explore.
Just like in the quest above, this one lets you gain access to a new realm, Niflheim. There are 4 ciphers just like before, but these are mostly found in later sections of the game. The first cipher appears once you get the Return to the Summit quest, after you exit out of the mountain. Second, is during the Path to Jotunheim quest, right before you flip the temple, look around for a gold tinted chest. Not long after that chest is your third, right after the puzzle with falling blocks of spikes. The final piece is inside the stomach of the World Serpent, when you dock to look for Mimir’s eye. Just in case you miss any of the cipher pieces and can’t go back for them, the game offers three additional areas where one can be found. Look to the Ruins of the Ancient, the Alfheim Tower, or the Lookout Tower for these extras. Once inside Niflheim, you can participate in timed trial mazes and enemy fights for materials for armor, and eventually another Valkyrie.
Valkyrie Quests
Prove Your Valor

Prove Your Valor give you the opportunity to battle some of the toughest enemies in the game.
Prove Your Valor is most likely the longest running quest throughout the God of War gameplay. It starts when you defeat your first Valkyrie and goes until you have successfully battled all 8. Most of these difficult encounters can be found in different Odin Secret Chambers throughout every realm. Here are all 8 Valkyries with their locations, as well as what they provide after the fight.
| Valkyrie Gunnr | Odin’s Chamber inside Thamur’s Corpse | Enchantment, Feathers of the Fallen Servant |
| Valkyrie Kara | Odin’s Secret Chamber inside the Witch’s Cave | Talisman of the Realms |
| Valkyrie Geirdriful | Odin’s Secret Chamber in The Foothills | Enchantment, Heart of Vanaheim |
| Valkyrie Rota | Odin’s Secret Chamber in Helheim | Blades Pommel, Grips of the Valkyrie |
| Valkyrie Olrun | Odin’s Secret Chamber in Alfheim’s Light Elf Shore | Enchantment, Ivaldi’s Corrupted Mind, and the Waist Guard of the Valkyrie |
| Valkyrie Eir | Odin’s Secret Chamber inside the Mountains Mine | Enchantment, Eye of the Winged Chosen |
| Valkyrie Hildr | Niflheim, far left corner | Enchantment, Heart of the Valkyrie, the Cuirass of the Valkyrie, and the Grips of the Fallen axe pommel |
| Valkyrie Gondul | The very top of the Muspelheim trials, only available after completing all lower levels | Enchantment, Eye of the Leviathan, the Gauntlets of the Valkyrie, and the Raging Inferno of Muspelheim |
The High Council

Finish helping the Valkyries by placing their helmets on their proper places.
A small task directly related to the other two Valkyrie quests. After defeating the Valkyries, Kratos picks up their helmets. For this quest, head to the Council of Valkyries, a large mass of land on the north part of the Lake of Nine between the Helheim and Alfheim towers. Then, you’ll need to place each helmet on their thrones.
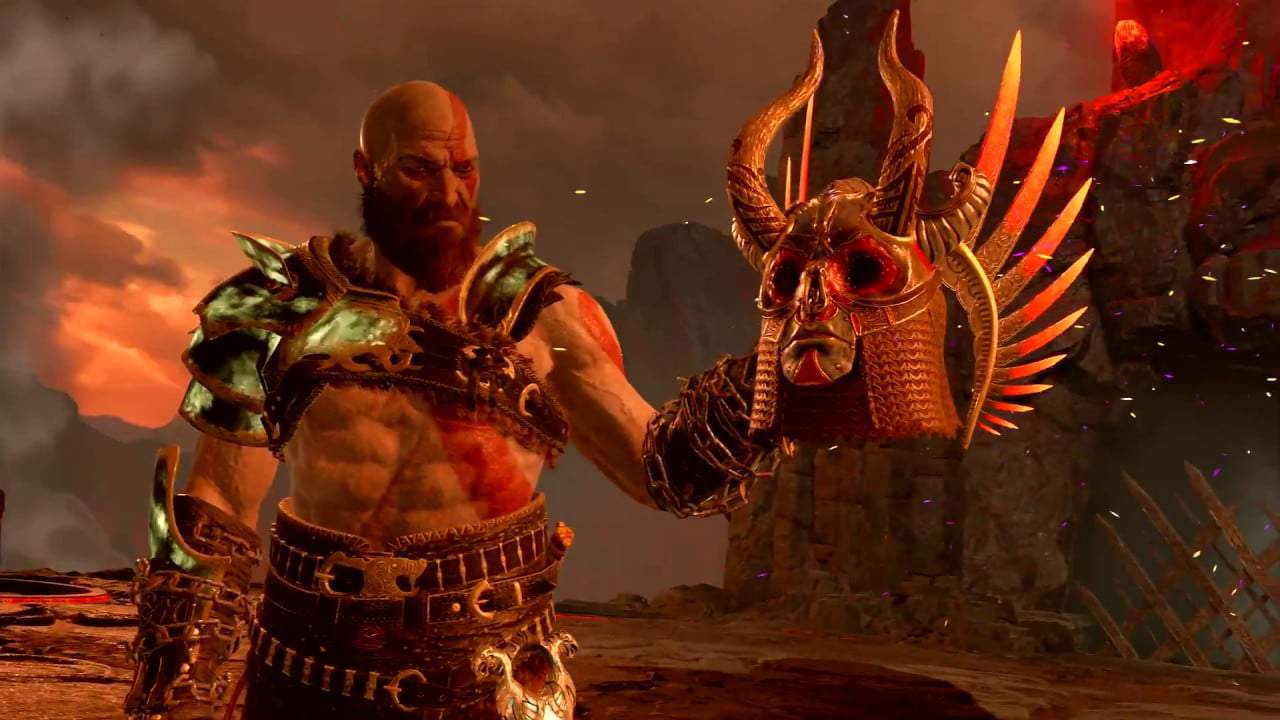
God vs. Queen

Probably the most difficult encounter in the game, the final Valkyrie isn’t here to play games.
The final quest on our list, and probably the most difficult, is a boss battle fit for a god! (And a queen) After defeating all 8 Valkyries, you have the opportunity to face off against the Queen, Sigrun. She’s an incredibly fast and agile opponent with deadly attacks and a huge health bar. You’re going to have your work cut out or you. If you manage to make it out alive, you’ll receive Sigrun’s Helmet, Njord’s Temporal Stone, the Retribution axe pommel, and the Chooser of the Slain trophy.

God of War is a Playstation 4 exclusive.


