The Legend of Zelda: Tears Of The Kingdom‘s Skyview Towers are a fresh spin on the now recurring videogame trope of climbing to the top of a tower to unlock a section of a map. As seen in countless Ubisoft titles and of course the previous game. Sure, in this title it maybe doesn’t refresh the formula enough (much like the core game) but they are still a lot of fun to find.
However, unlike the towers from the previous game, these ones require a little more effort than simply climbing to the top. With many of them having their own puzzles and obstacles to overcome. Some of which can prove to be rather hard, especially in the early stages of the game. But with this Tears of the Kingdom | Skyview Tower Guide I’ll give you all the information you need to get every tower as stress-free as possible. For more Tears Of The Kingdom Guides be sure to check out the Guides page.

Lookout Landing Skyview Tower
Located at -0295, 0140, 0025. This is the first tower in the game and one that is completed as part of the main story. As such there isn’t much to really worry about with it. All you need to do is go and find the patrol that is up closer to the Castle and make your way back. However, a couple of words of warning. Firstly, whilst the route to and from there is pretty danger free you could still get yourself into difficulty if you take any shortcuts; Jumping from too high, shield surfing and so on. The best way to avoid that is to simply walk there and back. The second warning, and this is one for all the towers so I’ll write it here, is that the towers function drastically differently from Breath Of The Wild. In that game, you just went to the top and that was it.

The first Skyview Tower is the easiest.
Here you are launched into the sky like a rocket. And if you aren’t careful you can leave a rather unwanted impact on the ground below. To avoid this try to land in large bodies of water. And if none are around (or your stamina is too low) you can use the paraglider to break your fall. It can be used rather late into a fall too, almost like you were base jumping. This can also be used to help give you more horizontal movement when falling. Just open and close it periodically to get a slight boost. Aside this, there isn’t much else to really worry about with this one.
Hyrule Field Skyview Tower
Located at -0753, -1019, 0064. This Tower can be incredibly tough in the early stages of the game. Basically, the way this one rolls is that the tower is guarded by a large number of moblins. Each one is far tougher and stronger than the ones you will have faced thus far in the early game. As such you have two options. Either wait till you are stronger and come back later. Or try and soldier on. Which is what I did. Once again, this one is really difficult in the early game. As such I recommend saving often. Not only will this save you some heartache but, at the time of writing, there is a strange quirk where many items here will respawn after you die, however the monsters won’t.

Using bombs and Recall can help with this one.
Because of this, you can exploit the many explosive barrels that spawn in this area to best effect. They can be triggered with flaming or explosive attacks with your bow or other weapons. They can also be dropped on enemies using the Ultra Hand power to great effect. Yes, it is rather exploitative. As this might be patched out later. But it works well enough for this Tears of the Kingdom | Skyview Tower Guide. Otherwise, you could try and stealth your way through once the initial batch of moblins is done with. Killing them all is not needed to unlock the tower. So you could just run through if you are brave enough.
Gerudo Canyon Skyview Tower
Located at -2432, -2178, 0307. Honestly, this tower is rather annoying to say the least. Or at least it was for me. As it is very easy to make a mess of when the solution is shockingly simple. When you arrive at the tower you’ll find that it has broken down. And that the repairman cannot get up to fix it due to the elevator being broken. Your job is to go to the top of the elevator and weigh it down so that the repairman can get up. You’d think that you’d use the supplies close by to make a new lift and weigh it down. But no, that is a waste of time.

Make sure to place this well to prevent it getting stuck.
Just behind the supplies, there is a large metal box which you have to attach to the elevator to get it to descend. It really is that easy. However, when you attach it you must be careful. Because if you don’t align it right the box can collide with the scaffolding. And if it does, you might need to go back down to the bottom and take it back up via the path which is guarded by Lizorfs. However, those can be instantly killed using fire attacks.
Gerudo Highland Skyview Tower
Located at -3960, -1312, 0429. I’m not going to lie dear reader. You might be better off leaving this one till later on. Unless you happen to have enough cold-resistant clothing or food to help you along. As the journey to get there is almost as annoying as the puzzle to unlock it. However, you can use the previous tower to give you a shortcut. When you do get to this tower you’ll find that the entrance to it is submerged under the ground. However, all is not lost. First, you must enter the cave just behind it and then make your way to the river and build a raft using the supplies there. Ideally, it will be a large one so you have more materials to work with in the next stage.
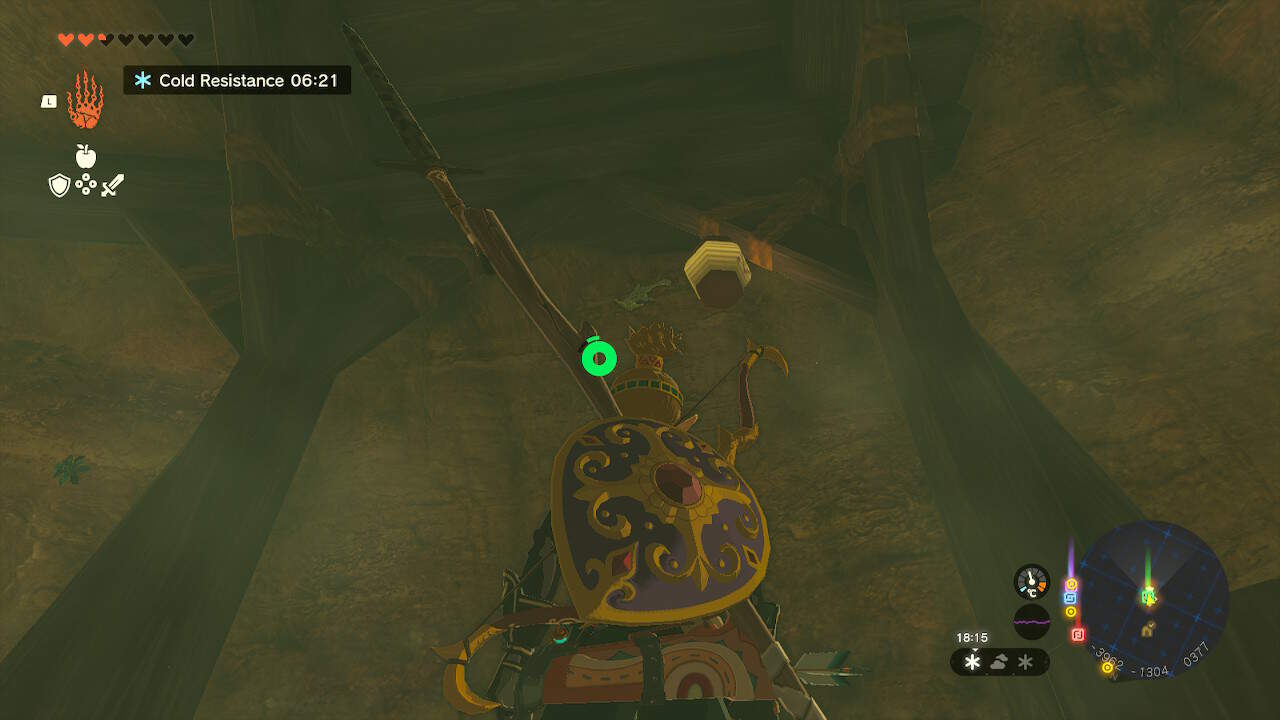
You need to use Ascend on the wooden area seen at the top of this screenshot.
Then ride the raft down the river. Being sure to jump off and glide before you are hit by the raft as it flips over. In the next area, you will see a collection of support beams connected to the ceiling. In the middle of which you will see a wooden square. You need to use the raft to create a platform under the square and then use the Ascend power on the wood section to gain access to the terminal in the tower and complete it.
Mount Lanayru Skyview Tower
Located at 3844, -1307, 0539. There isn’t really a challenge with this one persay. There is no challenge or puzzle to unlock it. No, the difficulty comes from getting to it. This Skyview Tower is situated at the top of a large hill in cold conditions. Whilst there is a path which winds all the way around it there are monsters that lurk around it. How difficult you find it will come down to how much cold resistance you have, and how good you are in combat.

This one isn’t too hard, just time consuming.
However, it is possible to skip some sections of it by climbing up the sides of the mountain. You can’t climb over the frozen sections, but there are sometimes gaps where you can climb between. This will cut your time getting up there considerably. Which may come in use should your cold resistance buffs start to run out. But, once you get to the top just walk in and you’re golden.
Eldin Canyon Skyview Tower
Located at 1636, 1183, 0225. It is time for another Skyview Tower which is, once again, broken. This time the lid has fallen off and the doors are blocked as a result. Right now you have three options. Firstly you can climb to the top. Just like Breath Of The Wild! However, this itself may be off-limits to you if you lack the stamina for it. You can get a boost starting a fire and using a Hylian Pine Cone on it to create an updraft. The other boost is to run to the cliffside seen in the picture below and glide towards the building. If done correctly you’ll land at a point you can climb up from.
-

- I jumped and then flew from here.

-
- If you do climb make sure to have stamina restorers

-
- Rewinding the falling rocks is a safe option.

You will need potions and foods to boost your stamina if you are doing this in the earlier game. Your third option is to use the Recall power on one of the falling rocks which land nearby. Just stand on it, use the power to get you high enough and glide over. Once you reach the top you need to glide down to the bottom of the tower. And then you can activate the terminal.
Rabella Wetland Skyview Tower
Located at 2420, -2760, 0222. This is one that seems easy at first, all you seem to need to do is set fire to the thorns and walk in. However, the heavy rain in the area makes that impossible. But, you will notice some sheltered areas on the perimeter. You can easily set a fire there which will give you access to the inner area. The next half is a little thicker, as there is nothing to shelter the thorns covering the door. Seeing as there isn’t a shelter then you’ll just need to make one.

Shelter the entrance to keep the rain off your fire.
Use the supplies nearby to create a roof across the thorns at the entrance and then set fire to the thorns there. All you need is to throw or shoot a Fire Fruit or use a weapon with a ruby fused to it to create a flame. If at first it doesn’t work, then you may have to move the roof slightly to provide better cover.
Thyphlo Ruins Skyview Tower
Located at 0343, 3133, 0180. This one is similar to the Eldin Skyview Tower; the doors are locked but here the top is blocked. However here you don’t need to climb all the way up. Nearby you will find a collection of large platforms. Now, the good news is that you don’t need to create a staircase with them or anything like that. The bad news is that this one requires a bit of timing and good object placement.

Time your jump well otherwise you could lose too much health or stamina.
Close by you will find some rockets which you attach to one of the flying platforms. Once they activate they will throw you and the platform flying into the sky and then you can just glide down to the roof and move the floating platform that is blocking the top. You need to time this well, making sure that you aren’t gliding too long if your stamina is still low. And of course you need to land on the roof with enough space to then move the platform. Once it is removed just float down and then you’re golden.
Sahasra Slope Skyview Tower
Located at 1344, -1170, 0166. Yet another entry on this Tears of the Kingdom | Skyview Tower Guide where the door is locked! Getting into this one is difficult. Not because of the challenge but due to how time and resource-consuming it can be, especially if you make a wrong turn. First off, you need to make your way to the cave just to the south of the tower and make your way in. From there you need to break through the rocks and then start to smash through the path blocking the tunnels on the left.

Go left, and then go left again until you see a cave with a bolder in it.
Once you break through those there will be a second set of rocks to break, again, break the ones of the left. This will lead you into a small chamber with a bolder on the wall. Just move that out of the way and enter the chamber behind that. In there use the Ascend power to gain access to the main room of the Tower. Inside there you need to remove the two wooden poles on either side of the door to get it to open. Once you do that the tower will be made available to you.
Upland Zorana Skyview Tower
Located at 2857, 0582, 0379. There isn’t really a puzzle with this one persay. The difficulty here comes more from getting up there rather than having to do something specific. However, on your way up to the tower you will notice a collection of these dark pools littering the landscape. Every now and then you will find blobs of goop falling from the sky. As such you need to try and avoid them otherwise you’ll take damage, with the puddles of them really slowing you down as you walk through it. So with that in mind just walk around them.

Be sure to stock up on splash fruit.
When you get to the tower you’ll notice that the door is blocked off by more or this goop stuff. In order to get into it you need to wash it away by throwing Splash Fruit at it, or firing Splash Fruit at it using an arrow or using an item with an opal fused to it. Either way a couple of throws of that and it will soon clear the way for you. On a side note, there is a Zorra near here who you can save by throwing Splash Fruit at him for a quick bonus.
Lindor’s Brow Skyview Tower
Located at -1901, 1243, 0297. This one is a bit of a mixed bag as far as difficulty is concerned. Your job is to get to the top of the island in the middle of the late. Yes, you can technically just swim to the middle then climb up to the tower. But if you have low stamina and/or lack stamina restoring items that is off limits. However you aren’t short of alternatives to doing that. Though how viable they are depends on what you have with you at this point in the game.

You can complete this Skyview Tower in many ways.
You can start a fire and throw a Hylian Pine Cone in to create an updraft and float over to the island. Or you can construct a bridge with nearby supplies and any trees you can fell close by. You can bring over a vehicle you’ve constructed or use the Autobuild to summon one up. Truth be told you aren’t really short on options on how to get there, so go wild! You can pretty much use almost any method listed on this entire Tears of the Kingdom | Skyview Tower Guide for this one.
Popla Foothills Skyview Tower
Located at 0602, -2119, 0098. I will admit dear reader, when I realised how to complete this Skyview Tower I felt like an idiot for taking so long to do it. So it is a good thing I’m here to help you not make so many mistakes! When you first arrive you’ll find the door locked with no way in. You’ll then hear someone shouting from inside the well. Jump down and you’ll find the person who was supposed to fix the tower trapped behind some bars.

Don’t forget (like I did) that you can use Ascend to get out the well.
To get him out you simply need to make your way to the entrance on the other side of the cliff and walk inside. To escape the well just use the Ascend power to get out. The entrance to the other side of the cave is located to the south of the tower so you’ll need to glide down to get into it. When inside you’ll find the switch you need to stand on to get them out. There is more treasure to be found here too, so it is well worth sticking around a little to get it. To get back up to the tower simply use the Ascend power again and then talk to the guy to open the tower.
Rospro Pass Skyview Tower
Located at -3684, 2343, 0233. Not an overly difficult one. The hardest part is actually getting up there. But even then it isn’t too hard. The biggest things to deal with are the cold temperatures. But buying protective clothing and having a Fire Rod equipped can help you. As well as cooking some cold-resistant food and potions. There is a fair bit of climbing involved. However, that is soon solved with stamina restorers. And you can skip some parts using fires and Hylian Pine Cones. Solving the regional phenomena can make things a little easier but to be honest, given how easy this is in comparison to that you might as well do this first.

Another time consuming journey for a simple puzzle.
Once you get to the top you need to burn away the thorns covering the entrance and you are good to go. To do this you can use a Fire Rod, flaming arrows, throw a Fire Fruit onto it, or simply start a campfire close by. Once the fire has spread and burnt away you can just walk in. Again, the hardest part here is the journey, and even then not by much if you’re prepared. Just be careful not to burn yourself in the process.
Pikida Stonegrove Skyview Tower
Located at -2318, 3066, 0443. Okay, so, this is one of the most needlessly difficult towers in the game in my humble opinion. As not only do you need to contend with the freezing cold weather but you also need to deal with the fact that the bridge to take you to the tower has shattered. Now, thankfully there are plenty of parts to build it. Sadly however these combined will not make a new bridge. More like a long ladder which you can climb up. Which can be stamina intensive. That is why I recommend saving a couple of pieces of the bridge to create platforms at the side to catch your breath.

Probably my least favourite in the entire Tears of the Kingdom | Skyview Tower Guide.
Alternatively, you can always use a Zonai construct if you have any saved to help you up. However there are no parts locally so you’d have to use whatever you have in the Autobuild. A word of warning when climbing up the bridge ladder; it can be hard to climb over the metal parts, so you may need to use the jump to get higher. Again, this costs a lot of stamina, so always have something to restore it on standby and possibly a few platforms to recover it on the way up. Once at the top just walk over and enter the Tower to unlock it.
Ulri Mountain Skyview Tower
Located at 3491, 2019, 0188. And finally, probably the easiest one in this Tears of the Kingdom | Skyview Tower Guide. Granted there are quite a few high-level monsters to get through to get here. However, those are easily avoided more often than not. When you arrive at the tower you’ll learn that the terminal to operate it has been stolen. Thankfully the culprit isn’t too far away, with the dialogue with Sawson showing exactly where they are.

Just use an arrow with an eye on it to kill the monster then run back with the terminal.
Just go over, fire off a homing arrow and then take the terminal back. Sure, the presence of other monsters and the chances of the terminal bouncing down the hill to a harder area to get can complicate things. But truth be told you shouldn’t have much difficulty with this one. Just make sure the monster if flying over an easy to reach area and run like hell if you can’t be bothered fighting the others. Once you have the terminal just take it back and place it roughly where it should go and talk to Sawson and you are done!
And so concludes this Tears of the Kingdom | Skyview Tower Guide. I hope that you liked it. If you have any tips for your fellow players leave them in the comments down below. And if you found the guide useful be sure to share it with your friends.