
It’s shrine mania in The Legend of Zelda: Tears of the Kingdom! And while they’re great to hone your skills in general, they’re particularly valuable to stack up on health and stamina to become the worthy champion Hyrule needs. They’re not all of the same difficulty, however. While some involve as much as literally walking down a flight of stairs, others involve quite a little brainpower. The difficulty of shrines hinges on two factors – how easy they are to find, and how easy they are to beat. One shrine that strikes a nice middle chord between those two is the Sahirow Shrine.
It’s located deep inside the frozen wilderness of Hebra and involves a true obstacle course, where Link has to jump over and duck under lasers that prove particularly punishing. As per usual, there’s also a chest obtainable, which can be a tricky one to get.
Here’s how to complete the Sahirow Shrine trial in The Legend of Zelda: Tears of the Kingdom.
Curious about other shrines? Then check out our guide on the tricky Mayachin Shrine, or check some of our other articles on The Legend of Zelda: Tears of the Kingdom!

Where to Find Sahirow Shrine
It will take a while before you reach Sahirow Shrine. It’s located at the foot of the Hebra Mountains, deep in the rugged Hebra region to the northwest of Hyrule proper. Fortunately, the missions in the early game take you in its direction pretty quickly.
-

- This is where you can find the exact location of the Sahirow Shrine.

-
- Once you made the perilous journey, venture inside!

To get to the Sahirow Shrine specifically, you’ll want to make your way to Rito Village. From there, you can see some shining lights in the background, which would be the Rospro Pass Skyview Tower. As with the other towers, this maps the area around it and launches you high into the sky. Head for some nearby sky islands to easily traverse far above the treacherous mountain passes. Especially the largest island in the West Hebra Sky Archipelago, on which the Ijo-o Shrine is located, gives you great opportunities to get closer to the shrine.
Shrine Guide
Sahirow Shrine’s main gimmick is that it’s all about dodging lasers, as Link jumps over them and slides under them to get to the other side in one piece. I should probably mention – one touch, one missed jump, and the ground gives way to the endless void, letting you plummet to your death. Let’s avoid that, shall we?
The first laser obstacle is simple enough. It’s just a single beam in a narrow corridor. To give yourself some additional momentum, sprint while jumping to prevent your jumps from falling short. You’ll be surprised how flimsy Link’s jump really is when your success starts depending on it.
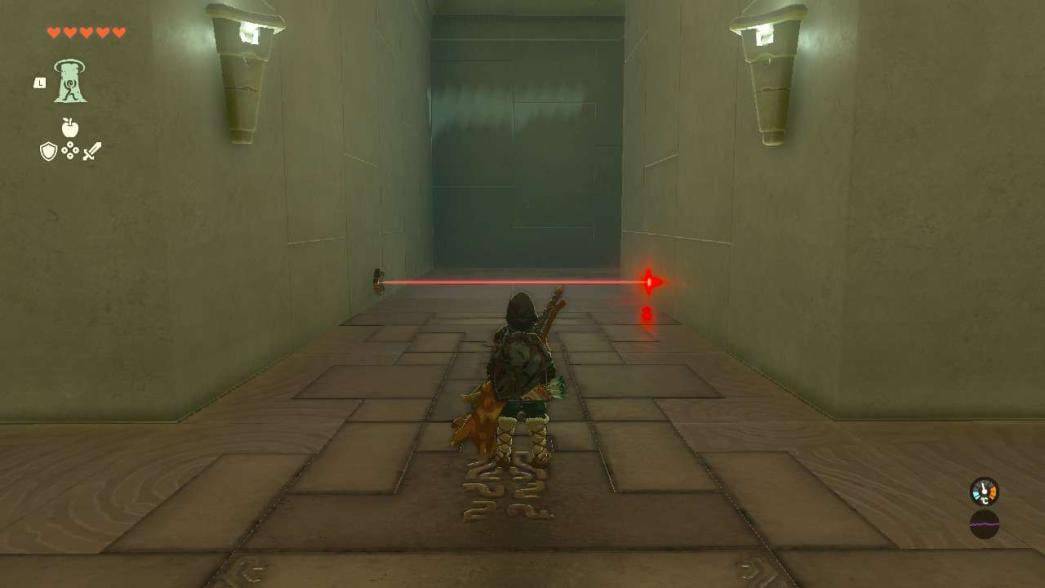
Run and jump to clear the jump more easily.
The second section is something straight out of a museum heist. Rather than giving you a lengthy story on how you should approach this seemingly intimidating puzzle, here’s how you do it:
- Jump over the first laser beam.
- Crouch below the second. You can crouch by pressing the right d-pad.
- Keep crouching to avoid the three diagonal laser beams. Walk to opposites of the room to minimize risk.
- Jump up the stairs, press B to sprint, and press X to jump at the right time do doge. Alternatively, you can use the glider here to give you just a little bit more airtime.
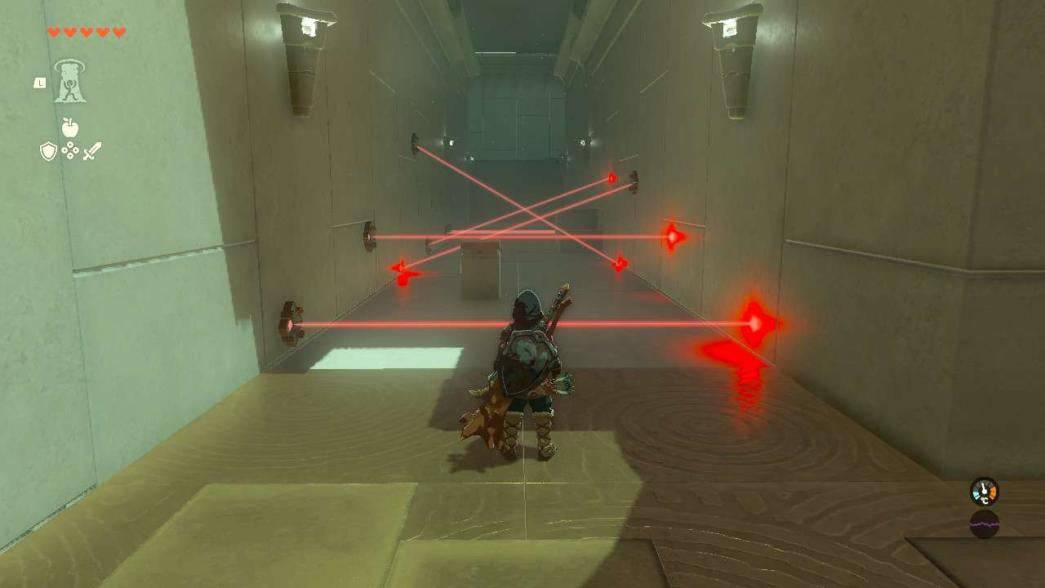
With careful movement, this part shouldn’t be a problem either!
Use Ascend to make your way up. Turn right for the additional chest (see the next section), or head left to complete the shrine.
Now we’ll get serious! As the door shuts behind you, you see a single laser approach you. At this point, that shouldn’t be a single problem.

The lasers move now! Still, just a warm-up.
Second laser! Simply crouch below it, no problems here.
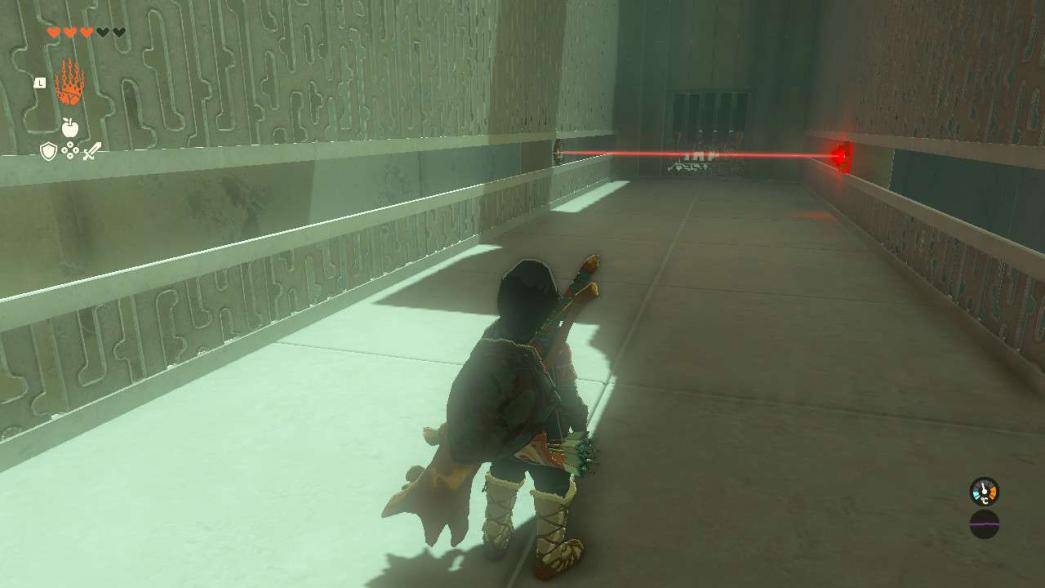
You don’t even have to jump or anything, just crouch and walk.
The third laser seems like it can’t be beat. A giant laser fence, which you can pass neither on its left or right side! Crouching or jumping isn’t an option either. So how about ascending? Fortunately, there’s a small area just in front of the laser where you can use Ascend. Avoid death, and walk up to the statue to finish the shrine.
-
- Looks like trouble! But we’ve got a trick.

-
- With Ascend, you can outsmart this trap.

Additional Chest
If you head to the right before the final section, you’ll have a chance to get a chest as well. Crouch below the laser to enter an area with two stone blocks – and a massive iron gate. To unlock the gate, simply use the Ultrahand ability to put a stone block in front of the laser behind you. Do keep your distance! Putting a block there will activate the laser, and the ground below it will open up. Fortunately, the door also opens up, letting you get to the chest and reap its sweet rewards. In this case, that’s a spicy elixir! Very useful for the blizzard outside.
-
- Move a block in front of the laser to open the door.

-
- Cold resistance, that’ll come in handy here!

When you head back, use Ultrahand to simply remove the block and dump it anywhere. Now, continue your route through the obstacle course to exit the temple again, and exit the shrine. Great job on completing the Sahirow Shrine in The Legend of Zelda: Tears of the Kingdom!


