 These tricks will cover some basic and helpful tips to aid your everyday encounters and situations within V Rising. Most of the content here will apply to PvE gameplay as most newcomers won’t join a PvP server as their first game, though some of the tricks stated here will have some PvP advice too.
Do note that not all tips here will be news to you and aren’t meant to help veterans with the game. However, some might still be of use to you in newer playthroughs or to help friends that you’ve introduced to the game. There is also a more in-depth beginner’s guide in keengamer, if you want to do some additional reading. But without further ado, let’s get into it.
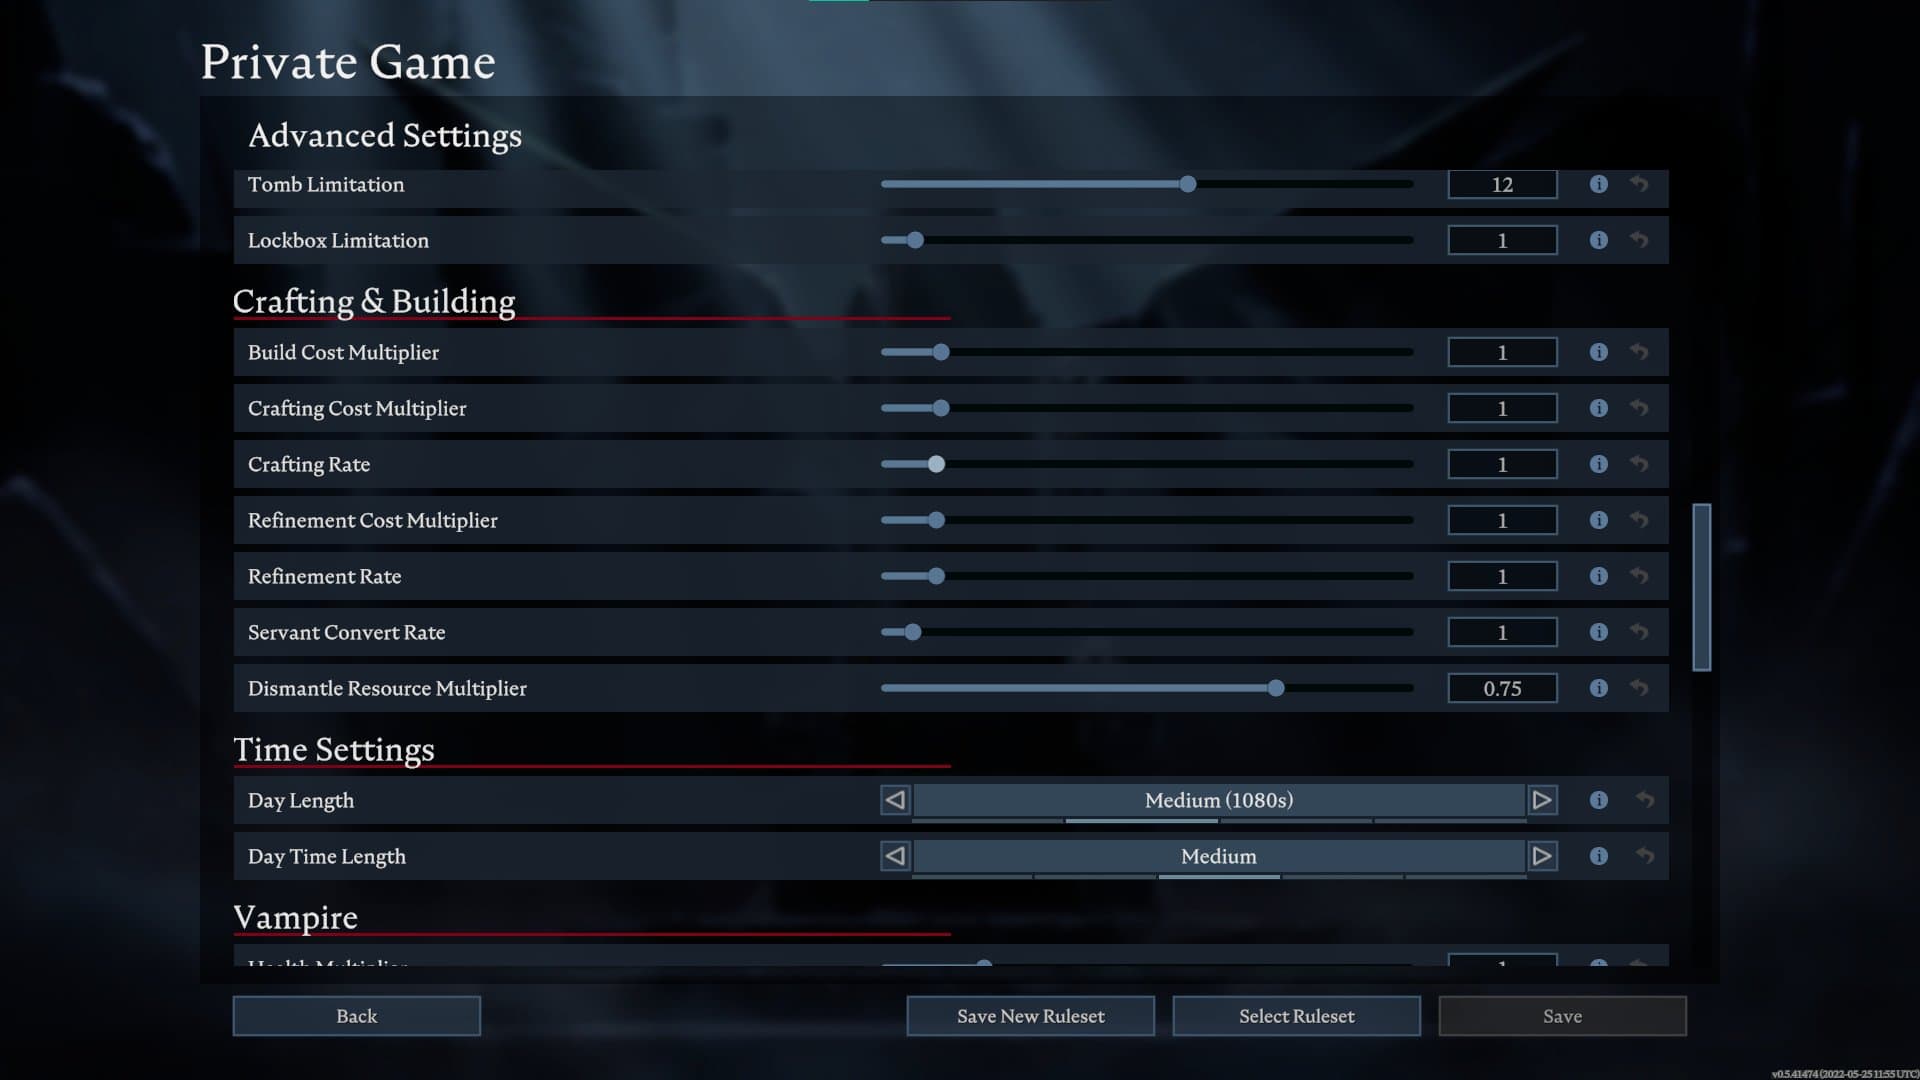
The advanced settings showing the crafting rate sliders
Don’t Be Afraid to Adjust World Settings
Let’s say you want to make a server for yourself or your friends; a good thing to do during world creation is to take a gander at the advanced settings present. You can adjust some game-changing ones like resource availability, build limits, or even how strong your weaknesses are; like garlic and sunlight.
But if you feel those are a bit of a cheat, I suggest changing at least a few important ones to help with your overall quality of life; these are the crafting rate and refinement rate. Many players often point out that the time spent crafting and refining takes quite long, and since you’ll be doing these a LOT, it wouldn’t hurt to speed up these bits, even if it’s just through a smaller margin.

The beam of sunlight getting stronger the longer players stay in the sun
How to Avoid the Sunlight
Unlike plants which will happily bask in the sun for nutrients, your vampire should hide from it at all costs. Though that isn’t news, there is some helpful stuff you could do to avoid becoming vampire barbeque. V Rising is known for its somewhat in-depth lighting and sunlight system, wherein you can avoid sunlight by hiding in the shadows cast by in-game objects. Note that the shadows of these objects will also move because of the position of the sun, so take note of that if you’re on a long battle under the shade as that shade might move somewhere else.
The sunlight in V rising doesn’t damage you instantly, but gives you roughly 3 or so seconds before you start burning. During those three seconds you’re free to run around sunlight given you can find shade afterwards. If you have a base available, you absolutely need “Mist Braziers” as they provide shade over a sizable area, given it has bones to burn as fuel. There are also some mitigations to sunlight like potions and clothing which will increase the time it takes before you start burning from sunlight. A good first choice is “Traveler’s Wrap” available after defeating “Keely the Frost Archer”, though you do need some cloth to craft it.
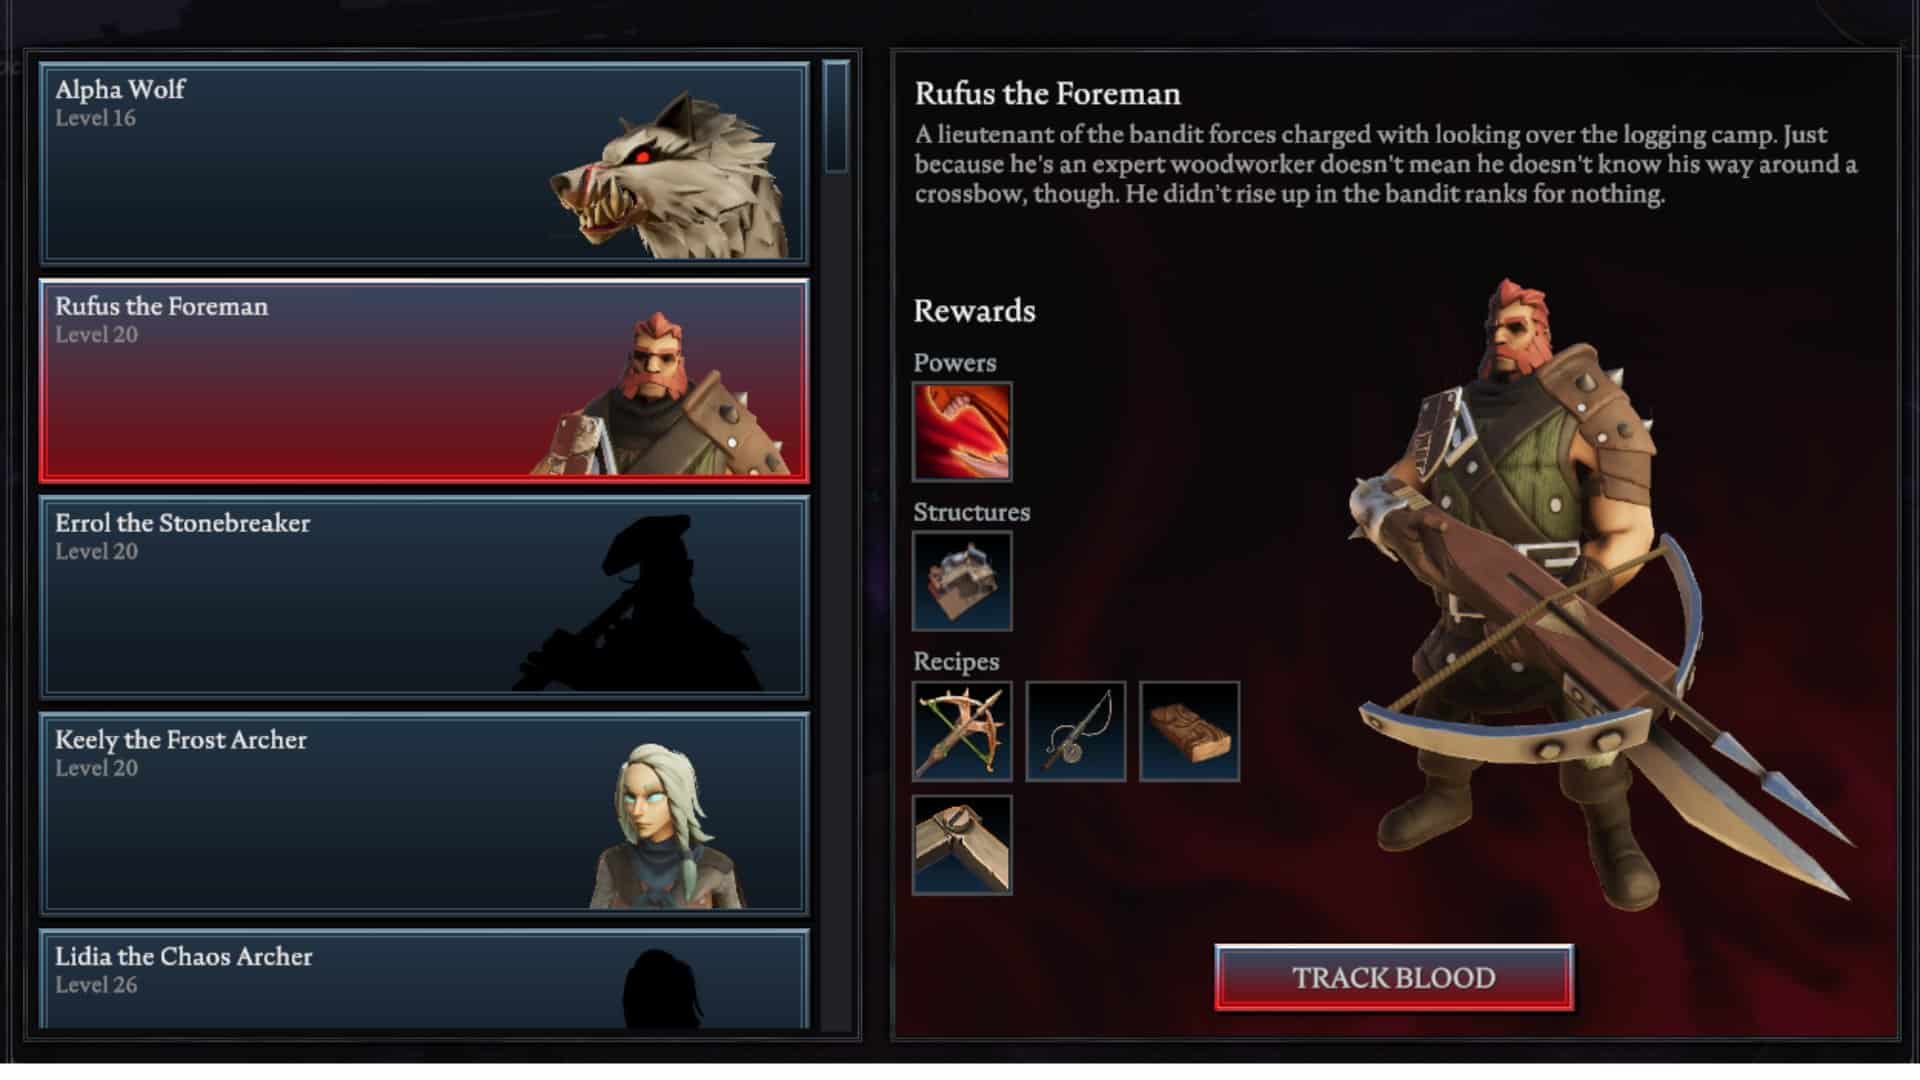
Rufus the Foreman’s info in the blood altar
Cut Down Rufus the Foreman
The Alpha Wolf will be most players’ first introduction to the bosses in V Rising, and with that, the quicker wolf form is available. What’s the next boss you should take down? Make it Rufus, and here’s why. Rufus is in a relatively accessible area marked by plenty of tree stumps, and upon his defeat he gives you a plethora of helpful items to further you in your journey, most notable being the “Woodworking Bench” which gives you access to the fishing rod and hunter’s crossbow. Along with great ability, we’ll cover in the next section.
There is a bit of a catch, however, the second phase of his fight can be quite difficult as he starts rapid firing his crossbow at you from time to time, this attack can stun lock you and deal massive damage. If you do get stun locked by the move, you can use your counter for a quick moment to escape the shots. Be sure to have at least a copper spear and plated bone armor before you fight him, along with some salves to help you heal up. Oh, and absolutely check that Tristan the Vampire Hunter is nowhere near the vicinity as he can patrol the area where you fight Rufus and make it a one-sided defeat for you.

A treant in the forest, slowly approaching the player
Treants are More Bark than Bite, Literally
If you’ve gone through a stroll to gather bark in the woods, chances are, you’ve been lovingly greeted by a treant and sent running in the opposite direction as fast as possible. And I can’t blame you, between it’s intimidating looks and skull icon, besides it’s health bar, every gamer instinct within you is telling you to fight it at a later stage in the game. But don’t let this tree’s bark fool you, as any player that knows what they’re doing can go toe-to-toe with this beast even while massively under leveled.
Before we get to some treant-cutting tips, you may be asking why we should even fight it as early as that. Well, apart from a sizable chunk of lumber you can acquire for it, which is always helpful, treants drop a wide variety of seeds which you can plant within your abode (much more efficient than wishing on RNG while killing giant rats). These seeds range from common to scarcer plants; once planted they take a while to grow, but upon maturation they glow and that’s the signal for you to attack them and gather their drops. Things don’t end there, however, as these plants will continuously regrow, much like a farm.

The treant using it’s branching roots attack at the player’s dodge clone
Prepare to bring your copper spear and some basic protection and the Blood Rage acquired from Rufus, and let’s get logging. The treant’s phase 1 is ridiculously easy as it only has one attack with an incredibly long wind-up time. During this you can attack all you want but be careful not to overextend; those attacks might be slow but they hit like a truck. When you attack, be sure to incorporate blood rage and your spear’s special attack to deal the most damage possible. It’s second phase ramps things up with a bullet hell of roots that can immobilize you if you get hit, after which it will approach you to prepare its swing. Thankfully, a simple dash before he does that can make the attack miss completely.
On PvP servers, however, I wouldn’t recommend taking on the treants this early because of multiple reasons. The first is that it has a lot of health; the longer you fight something, the more you leave yourself vulnerable to an enemy player killing you and reaping the rewards. Second, treants produce a lot of distinct noise during battle, couple that with the long fight time, and the chances an enemy finds you get a lot likelier.

The waygate in east Farbane Woods
Waygates are Your Friends
While exploring outside the tutorial for the first time, you’ve probably noticed a waygate in the vicinity, but the moment you try to do so, it warns you about losing your items. This can intimidate players to not using waygates at all, but there are actually some catches to alleviate this stigma. Firstly, not all your items will disappear when using them; you will keep your weapons and equipment very much like how death works. Secondly, there are some bypasses to the item loss mechanics you can make use of.
The most convenient is to probably setup a sub-base or even your main base within the vicinity of the waygate. This’ll ensure you have a place to stash your items and quickly travel to another spot. Do note that use “Vampire Lockboxes” to guarantee that no random player can just snag your stored items while you teleport. You can also try joining clans that have outposts near waygates, giving you quick access to quick lockboxes without needing the extra resources to do so.

The Vermin Nest constructed in a base
Make use of the Vermin Nest
Sure enough, you’ll be on your way to making bases, and you may skim over the vermin nest, thinking it isn’t much of a necessity. However, unlike the vermin of the real world, their equivalent here can prove helpful. To start with, you’ve probably noticed that rats can be used to make salves, which is a necessity for mid-battle healing. Rats are only rarely found in graves or rarely after cutting a tree, the vermin nest can spawn rats for you (given you have the materials needed of course), in the comfort of your very home.
Aside from rats, there are other creatures worth spawning, giant rats, which will give you some animal hide but will also seldom drop helpful seeds. But one of the other main reasons you’d want to build a vermin nest is because of the boss, putrid rat. It is the only boss that you need to “craft” first before you can slay it. Once you’ve defeated Rufus, he gives you access to the fishing rod, and fishing is important as some of the materials for the recipes here are from catching fish.

An example of stairs being used on a cliff
How to Use Stairs and Cliffs to Your Advantage
The lands of V Rising are littered with cliffs and elevations that could be made use of for multiple purposes. The first of which would be because elevations provide good places for bases as it means there is an additional “second barrier” that surround your building. The only way up these cliffs would be through the “ramps” that allow you to go up them. Cliffsides are also useful escape options as upon pressing shift, you can drop down to the are below, stopping most enemies’ pursuit. The only downside to bases built on these elevations is that it may feel limited, but that’s where the use of stairs comes in.
Stairs can be quite confusing at first, as when you try building one even with all the options met, it looks like it doesn’t work properly. You may be thinking it’s used to make a “second floor” for your base, or a way to ascend cliffs, but, they’re actually used on those “ramps” mentioned earlier. They may seem to only have aesthetic purposes, but they’re helpful for allowing you to expand your territory onto cliffsides, as normal territories cannot be placed on cliffs themselves.

The axe’s wide swing allows you to gather resources from multiple trees
Resource Farming Tips
Smacking the life out of inanimate objects plays a big part of your playtime in V Rising. As such, you’d naturally want to find ways in order to gather resources at a faster rate, and we have the tips for you. A good first note is to try and hit multiples of the resources you’re collecting; weapons have a generous swing radius, and you can take advantage of this by trying to hit as much collection points as possible. Another way to quicken things up is to equip the skill “Blood Rage” skill from Rufus, as it increases your attack speed, allowing you to gather resources at a faster rate.
To follow up, attack speed affects how fast you gather materials; aside from blood rage, you can look into other attack speed boosting items as well. If you want even more efficiency, changing your blood to something more helpful can work, though if you’re planning a full-on gathering session, get the worker blood for sure. Worker blood provides a bunch of helpful buffs, most being specially designed for resource collection, and to get your hands on this blood you need villagers, one of which is present in a bandit camp (inside the cage) in the West Farbane woods. Additionally, when gathering rock-based resources in sunlight, you can circle around the object to find the spot where it’s shadow is, when you do so you can stay there and hit it without worrying about sunlight, just be mindful of the shadow’s movement.
Conclusion
V Rising is an amazing game with a ton of content and places to explore, and it may seem intimidating to take it in all at once. Without a proper wiki as of now as well, it can be a bit of a maze for newer players to navigate; that’s why we write guides like these. These tricks can be applicable for the everyday situations you may find yourself in; rest assured now that you’ve read it, you’re at least more adept at the game. Though don’t be afraid to read up more, as the more you progress, the more new things you may find that confuse you.


