Arcane Odyssey is an open-world MMORPG on Roblox that puts players on the high seas as swashbuckling spellcasters. The game currently has almost 50 million visits, an astonishing achievement given it’s still in early access. This Arcane Odyssey starter guide breaks down everything new players need to know, including magic, the first storyline quests, and how to level your character.
From the beginning, Arcane Odyssey thrusts players into an unfamiliar environment. While there are quest markers to guide you, there’s a lot to learn when you create your first character. Follow these steps to get started the right way.
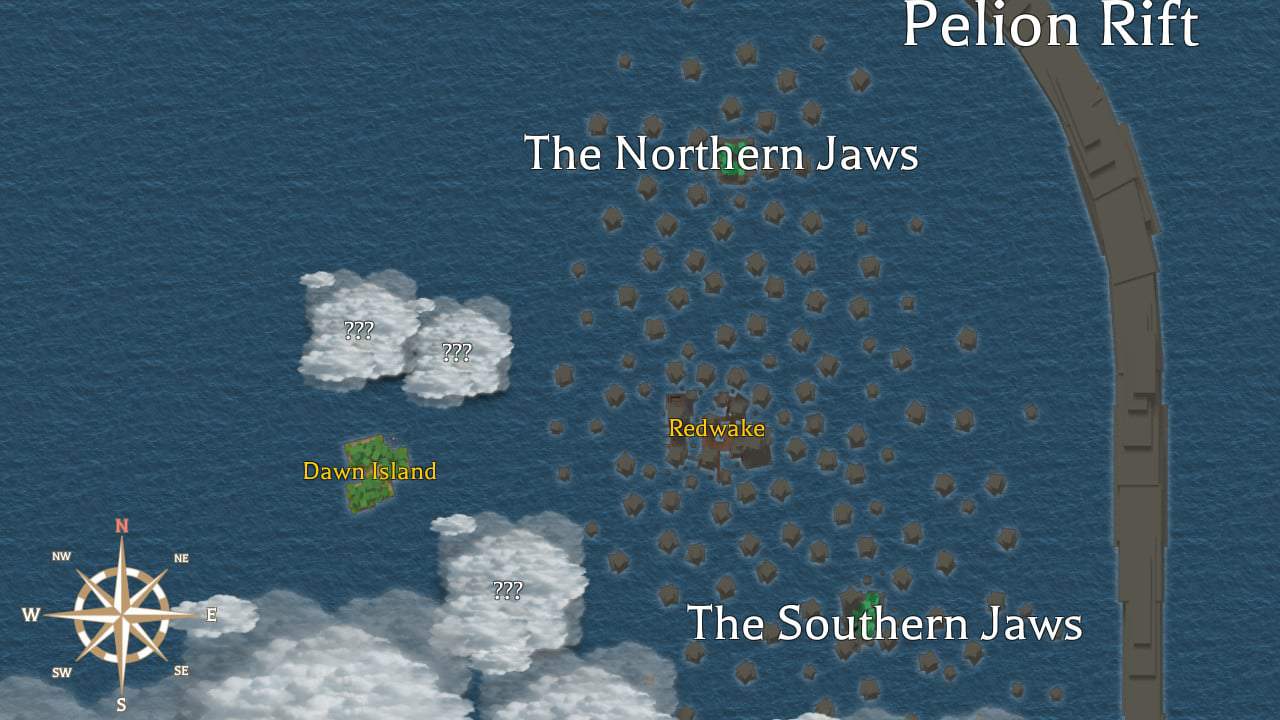
The player spawns on Dawn Island in the Bronze Sea.
Arcane Odyssey Starter Guide – Magic
After choosing your name and customizing your character, you’ll have to pick which kind of magic you want to use. Before you decide, know that you won’t be able to change your mind later. Each magic has unique stats to suit every kind of player, so choose the one that best matches your playstyle. Magic is well-balanced in Arcane Odyssey, and no one type is particularly better than another. Moreover, if you choose to invest in magic, you’ll be able to unlock more than one type later on.
With regard to stats, magic damage and speed are fairly self-explanatory. Magic size refers to how large spells are, ranging from single-target to massive areas of effect. Finally, destruction indicates how much damage spells will do to the environment. Destruction has little impact on gameplay, but if you don’t want to wreak havoc on the terrain, you should keep it in mind.
- High Magic Damage: Poison, Acid, Magma
- High Magic Speed: Light, Lightning, Plasma
- Large Magic Size: Ash, Earth, Explosion
- High Destruction: Explosion, Lightning, Metal
Magic grants abilities called spells, which take up one of eight slots in your menu. To use a spell, press its corresponding key; the first spell you get access to is usually bound to ‘Q’. As you learn more spells, you can bind them to other keys for quick use in combat. Keep in mind that using magic will drain your Energy bar—once you run out of Energy, you won’t be able to cast any spells. To refill the bar, stand still and hold down the Shift key.

Charging your Energy creates spectacular effects.
Arcane Odyssey Starter Guide – Leveling Your Character
Completing story objectives, completing sidequests, and defeating enemies will grant your character experience. Each time you level up, you’ll be given Skill Points, which can be allocated into four different stats: Vitality, Magic, Strength, and Weapons. To see your character’s stats, press the ‘J’ key.
- Vitality: Increases your maximum health, but reduces your damage output slightly. In turn, having high vitality allows you to use spirit weapons.
- Magic: Increases your knowledge of magic, allowing you to use stronger spells, master multiple magics, and more.
- Strength: Increases your athleticism, allowing you to use stronger melee attacks, master multiple fighting styles, and more.
- Weapons: Increases your experience in using weapons, allowing you to use stronger weapon abilities, master higher level weapons, and more.
Though you’re introduced to magic early in Arcane Odyssey, using it is entirely optional; you can build your character effectively and never use magic at all. Even so, magic is very useful in combat, especially for inflicting status effects. Fighting styles are another form of combat, and are based on your Strength. In addition, fighting styles grant abilities called techniques, which work very similarly to spells and occupy one of eight slots in the menu. All weapons, meanwhile, come with preset skills that depend on the Weapons stat. Everything from daggers to flintlocks counts as a weapon, making for a diverse range of options in combat.
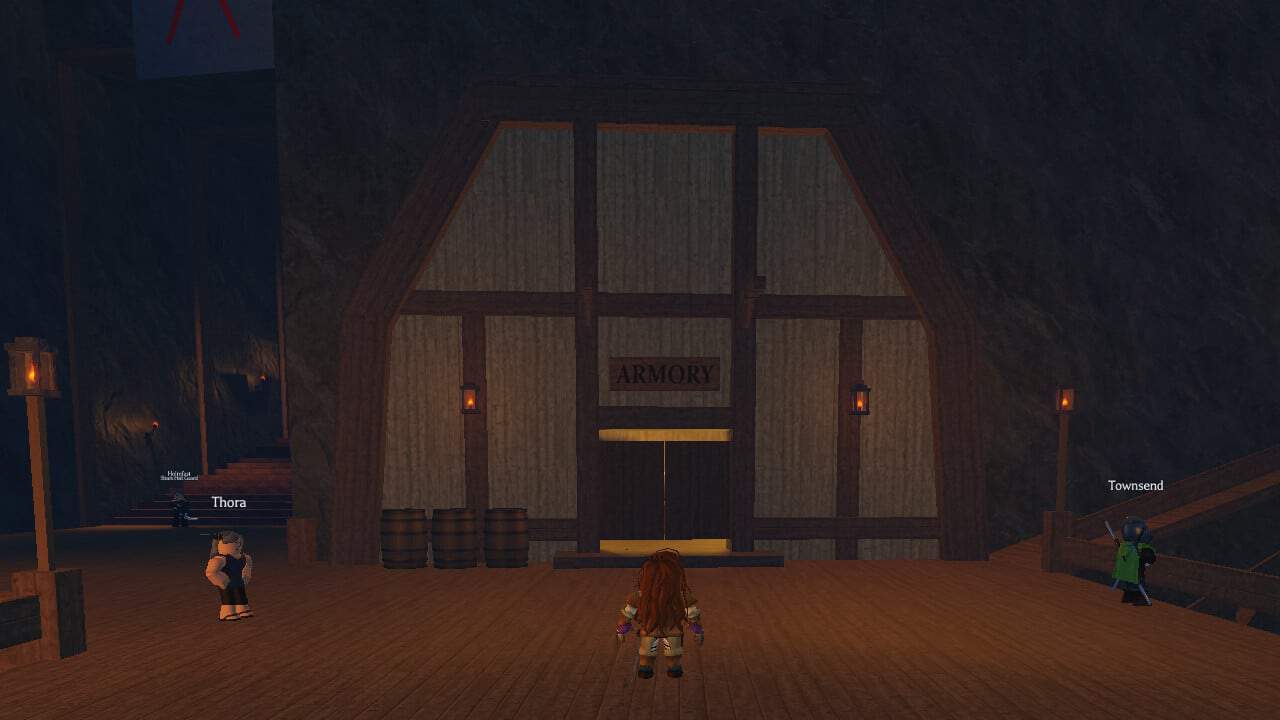
You can buy new weapons and armor at the Armory.
Arcane Odyssey Starter Guide – Early Quest Walkthrough
Players spawn on a small, rainy island in the Bronze Sea. Without knowing who or where you are, you’ll have to get your bearings. Our Arcane Odyssey starter guide takes you through the first ten quests in the game’s main storyline.
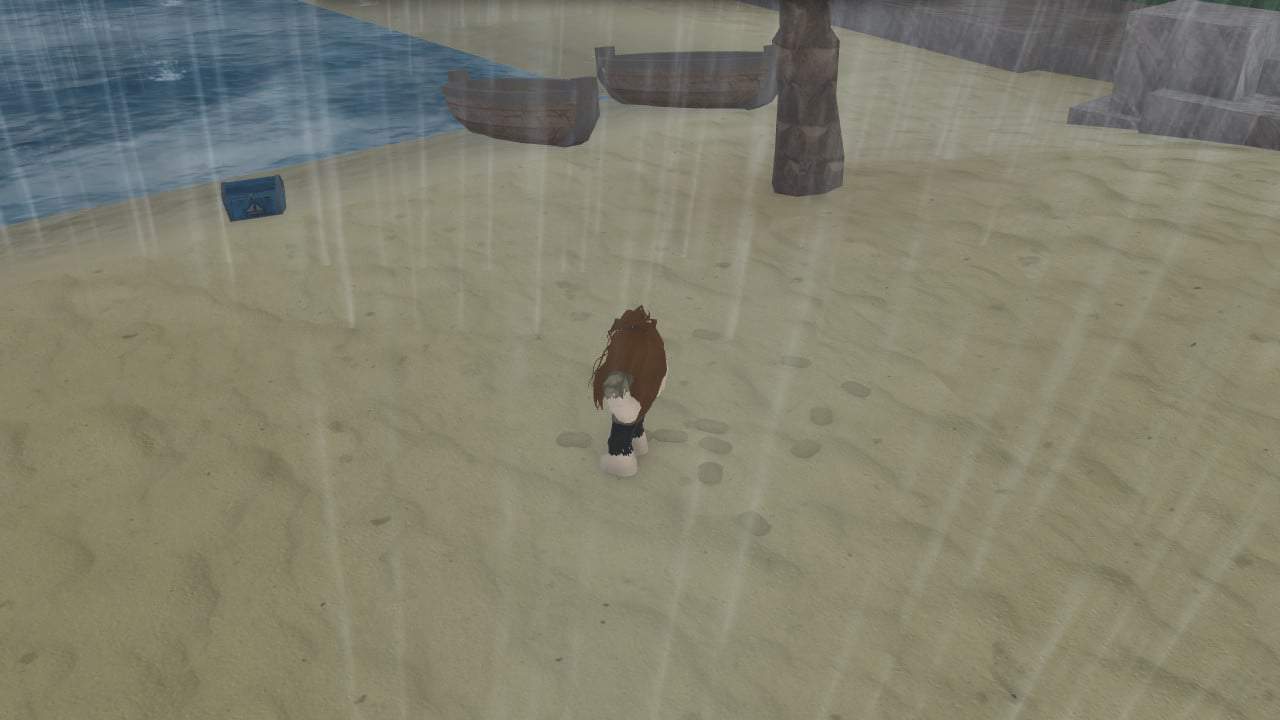
New players first spawn on this beach.
Quest 1: Awakening
This quest directs the player to explore the island. You should take your time doing this because there are a lot of small items on the ground you might miss. Some of these are food items, like coconuts, which you’ll need to restore your hunger bar. Others are shells and clams which can be sold to merchants. As you explore, keep a sharp eye out for treasure chests, which can give you Galleons. Galleons are Arcane Odyssey’s form of currency, so collect as many as you can.
Once you’re satisfied, make your way up the tall hill at the center of the island. Here you’ll find Morden, who fills you in on how you got to the island. He’ll suggest you head to Redwake, the nearest town.

Morden is the first NPC players will meet in Arcane Odyssey.
Quest 2: Redwake of the Bronze Sea
After speaking to Morden, the “Dock Rowboat” button will appear on the lower lefthand side of the screen. Head back down the hill and approach any part of the water, then click the button. Once the rowboat spawns, jump in and press E to take command. This will allow you to steer the boat and sail to Redwake.
Redwake is roughly east of the island, so head in that direction. A quest marker will guide you to ensure you don’t get lost. There are tall rocks in your way, so be sure to avoid them; boats in Arcane Odyssey can take damage and sink. Navigate carefully and make your way toward the dock in front of the town.

Redwake has lots of shops and facilities for players to use.
Quest 3: Clear the Pirates
When you arrive in Redwake, you’ll find an NPC named Estrid hiding at the dock. She tells you a group of pirates is attacking the town and must be driven out. To complete the quest, you need to defeat five of them.
The Jaw Pirates are the first enemies you’ll encounter in the game. You have three ways to damage them: magic, the Old Dagger, or Basic Combat. Magic makes for a good ranged option, while the Old Dagger can deal quick damage as a melee weapon. Basic Combat is best at short range and deals more damage than the Old Dagger.
Enemies will attack you once you get close enough. Be careful not to draw too many Jaw Pirates to you at one time, and keep a close eye on your Health and Energy bars. The Jaw Pirates aren’t difficult to defeat, but you can easily be overwhelmed by their numbers.

Pirates are a constant threat in Arcane Odyssey.
Quest 4: Talk to Estrid
After defeating the Jaw Pirates, you’ll need to talk to Estrid again. You can find her at The Red Fin where she works as the Tavernkeeper. She’ll thank you for defeating the pirates and offer you a free room to stay in, which you can use indefinitely.

You can always find Estrid at The Red Fin, Redwake’s tavern.
Quest 5: The Red Fin
Your room at the tavern is just up the stairs. Enter the first door on the right and approach the bed; this will allow you to rest. This room will now become your spawn location if you die.

Your room at The Red Fin is on the right.
Quest 6: Talk to Estrid (Again)
Head back down the stairs and talk to Estrid one more time. She’ll tell you that Chief Alfarin, the leader of Redwake, has returned and wishes to speak with you. He can be found in the Shark Hall, which is next to the tavern.

Shark Hall is at the top of a large staircase next to The Red Fin.
Quest 7: Meet Chief Alfarin
Exit the tavern and turn left. This will take you to the Shark Hall, where Chief Alfarin resides. Walk past the two guards and up the stairs, then into the hall. Chief Alfarin is the NPC sitting on the throne at the back of the room.
Chief Alfarin will thank you for dealing with the pirates, then ask for a favor: he wants you to visit a hermit living on an island southeast of Redwake. Before you leave, however, he’ll tell you to complete some sidequests around town.

Chief Alfarin sits on the throne of Redwake.
Quest 8: Preparing for the Journey
There are four different sidequests you must complete in order to progress the main questline. You can access these sidequests by speaking to various NPCs around Redwake, each marked with a green question mark. These are fairly simple quests with straightforward objectives, but they all require navigating around Redwake. Follow these steps accordingly.

NPCs like Dotta will give the player sidequests to complete in Arcane Odyssey.
Dotta’s Necklace
You can find Dotta in the town square, the center of town just beyond the dock. She’ll tell you about her necklace, a family heirloom that she dropped somewhere on the northern side of Redwake. Using the compass on your screen, head north from the town square; the quest marker will also guide you in this direction. Rather than leading you directly to the necklace, however, the marker will take you to a section of town surrounded by a green sphere. The necklace is somewhere within this area.
Look for an NPC named Hundi, then walk down the wooden ramp behind him. Dotta’s necklace is hidden behind some barrels and a crate on this platform. Take the necklace, then head back toward the town square. Speak to Dotta one more time, and you’ll complete the quest.

Dotta’s necklace hidden behind a crate.
Helping Hundi
You may have noticed that Hundi also has a green question mark over his head. His sidequest involves retrieving some wooden boards from Redwake’s warehouse, which he can use to repair the bridge to his house. Make your way back to the harbor, then turn right before you reach the dock. You’ll see a large pair of wooden doors that are now open.

Hundi can be found near Dotta’s necklace.
Secure the Warehouse
When you enter the warehouse, you’ll find a small group of Jaw Pirates waiting inside. You’ll have to defeat all of them, so try and lead them outside the warehouse. This way, you can move around and avoid being cornered by the group. After defeating all of them, leave the warehouse and return to Hundi.
The warehouse usually has crates and treasure chests lying around. Be sure to pick these up before you go, as they’ll give you valuable food, galleons, and items. Always be on the lookout for these objects!

The warehouse is located left of the dock.
Hundi’s Gift
When you return to Hundi, he’ll thank you for giving him the planks and repair the bridge. Afterward, he’ll insist that you deserve a reward for defeating the remaining Jaw Pirates. To obtain this reward, he’ll tell you to find Jomar, Redwake’s resident armorer.
The armory is located in the town square, just to the right of Shark Hall. Head back there, then go inside and speak to Jomar. He’ll thank you for helping Hundi and give you an Old Flintlock as your reward.

Jomar, like all armorers, has a small icon above his head.
Quest 9: The Hermit of the Jaws
After completing these four sidequests, you should have earned plenty of experience and Galleons. The hermit lives on an island southeast of Redwake, so you’ll need to dock your boat and sail there. Before you leave, make sure you allocate your Skill Points and upgrade your equipment at the various shops around Redwake. You’ll need better armor and weapons once you reach the island.
When you’re ready, dock your boat at the harbor and head for the island. Once again, navigate carefully around the rocks and avoid damaging your boat. When you reach the island, head for the small camp in the middle. The hermit, named Shura, will be waiting for you.
The hermit can be found at the end of this path.
Quest 10: The Wandering Ronan – First Boss Fight
Shura is the first boss you face in Arcane Odyssey. He has a lot more health than regular enemies and moves in unpredictable ways, sometimes appearing mid-air above the player. In addition, his use of Acid Magic can deal large amounts of damage to the player very quickly.
To defeat Shura, you’ll want to attack from a distance, as Acid Magic is dangerous at close quarters. Shura’s Katana will allow him to approach quickly, so try to keep moving. The Old Flintlock is a great weapon for this fight, as it allows you to deal damage from far away and inflicts the Bleed status effect. Magic is also very effective against Shura, but make sure you take cover before recharging your Energy. Once you’ve defeated him, he’ll stop attacking and you’ll enter a cutscene.

Upon meeting Shura, the player will enter their first boss fight in Arcane Odyssey.
Arcane Odyssey Starter Guide – How to Unlock Fishing
To unlock fishing in Arcane Odyssey, you’ll need to complete the sidequest “Learning to Fish” in Redwake. This sidequest is given to the player by an NPC named Audbjorg, who can be found to the right of the harbor on the lower level of Redwake. Speak with her to get a Wooden Rod, Fish Bait, and a challenge: catch five fish and show them to her.
In order to fish, you have to start by facing the water. Equip the Wooden Rod in your hotbar, then click on the water to cast your line. Watch the bobber closely and wait for it to go under. Click your left mouse button as fast as you can to reel in the fish. Do this five times, then speak to Audbjorg again. You’ll get some Galleons and experience for your trouble, along with the Wooden Rod and Fishing Bait for free.

You can learn how to fish in Arcane Odyssey from Audbjorg.
Arcane Odyssey Starter Guide – How to Unlock Cooking
Cooking is very important in Arcane Odyssey. If your Hunger bar is empty, you’ll gradually lose health until you die. Though you can restore Hunger with the Ingredients you find lying around, these only fill your Hunger bar by a small amount. In comparison, cooked food restores a lot more Hunger and can even grant the player beneficial effects (though these are temporary). To start cooking, you need to complete the “Learning to Cook” sidequest.
Talk to the NPC named Asfrith in Redwake’s town square. He’ll give you a set of ingredients you can use to cook a meal. Select those ingredients in your backpack and approach the cooking pot next to him. Add each ingredient by pressing the ‘E’ key; you can add up to four of them. Press ‘Q’ to cook, and you’ll receive a meal based on your ingredients. The more ingredients you add, the better your meal will be. Try to include a seasoning, as this will further increase your meal’s quality.
Speak with Asfrith again, and you’ll receive Galleons and experience. You can also keep the remaining ingredients he gave you. If you forget how to cook, you can always ask him for a refresher.

Use the cooking pot next to Asfrith to cook. You can also buy food from the Food Merchant.
Arcane Odyssey is available to play now on Roblox. If you’re a fan of horror games, you should check out this list of spooky Roblox games. Good luck on your adventures in the Bronze Sea!


